Corppass Setup Guide for CareersHorizon
Table of Contents
Important Note
Only a Corppass Entity Admin or Sub-Admin can perform these actions. Please ensure you have the appropriate role before proceeding.
Part 1: Assigning CareersHorizon to Your Organisation
For Entity Admins: First, add the 'CareersHorizon' e-Service to your company's Corppass account.
1
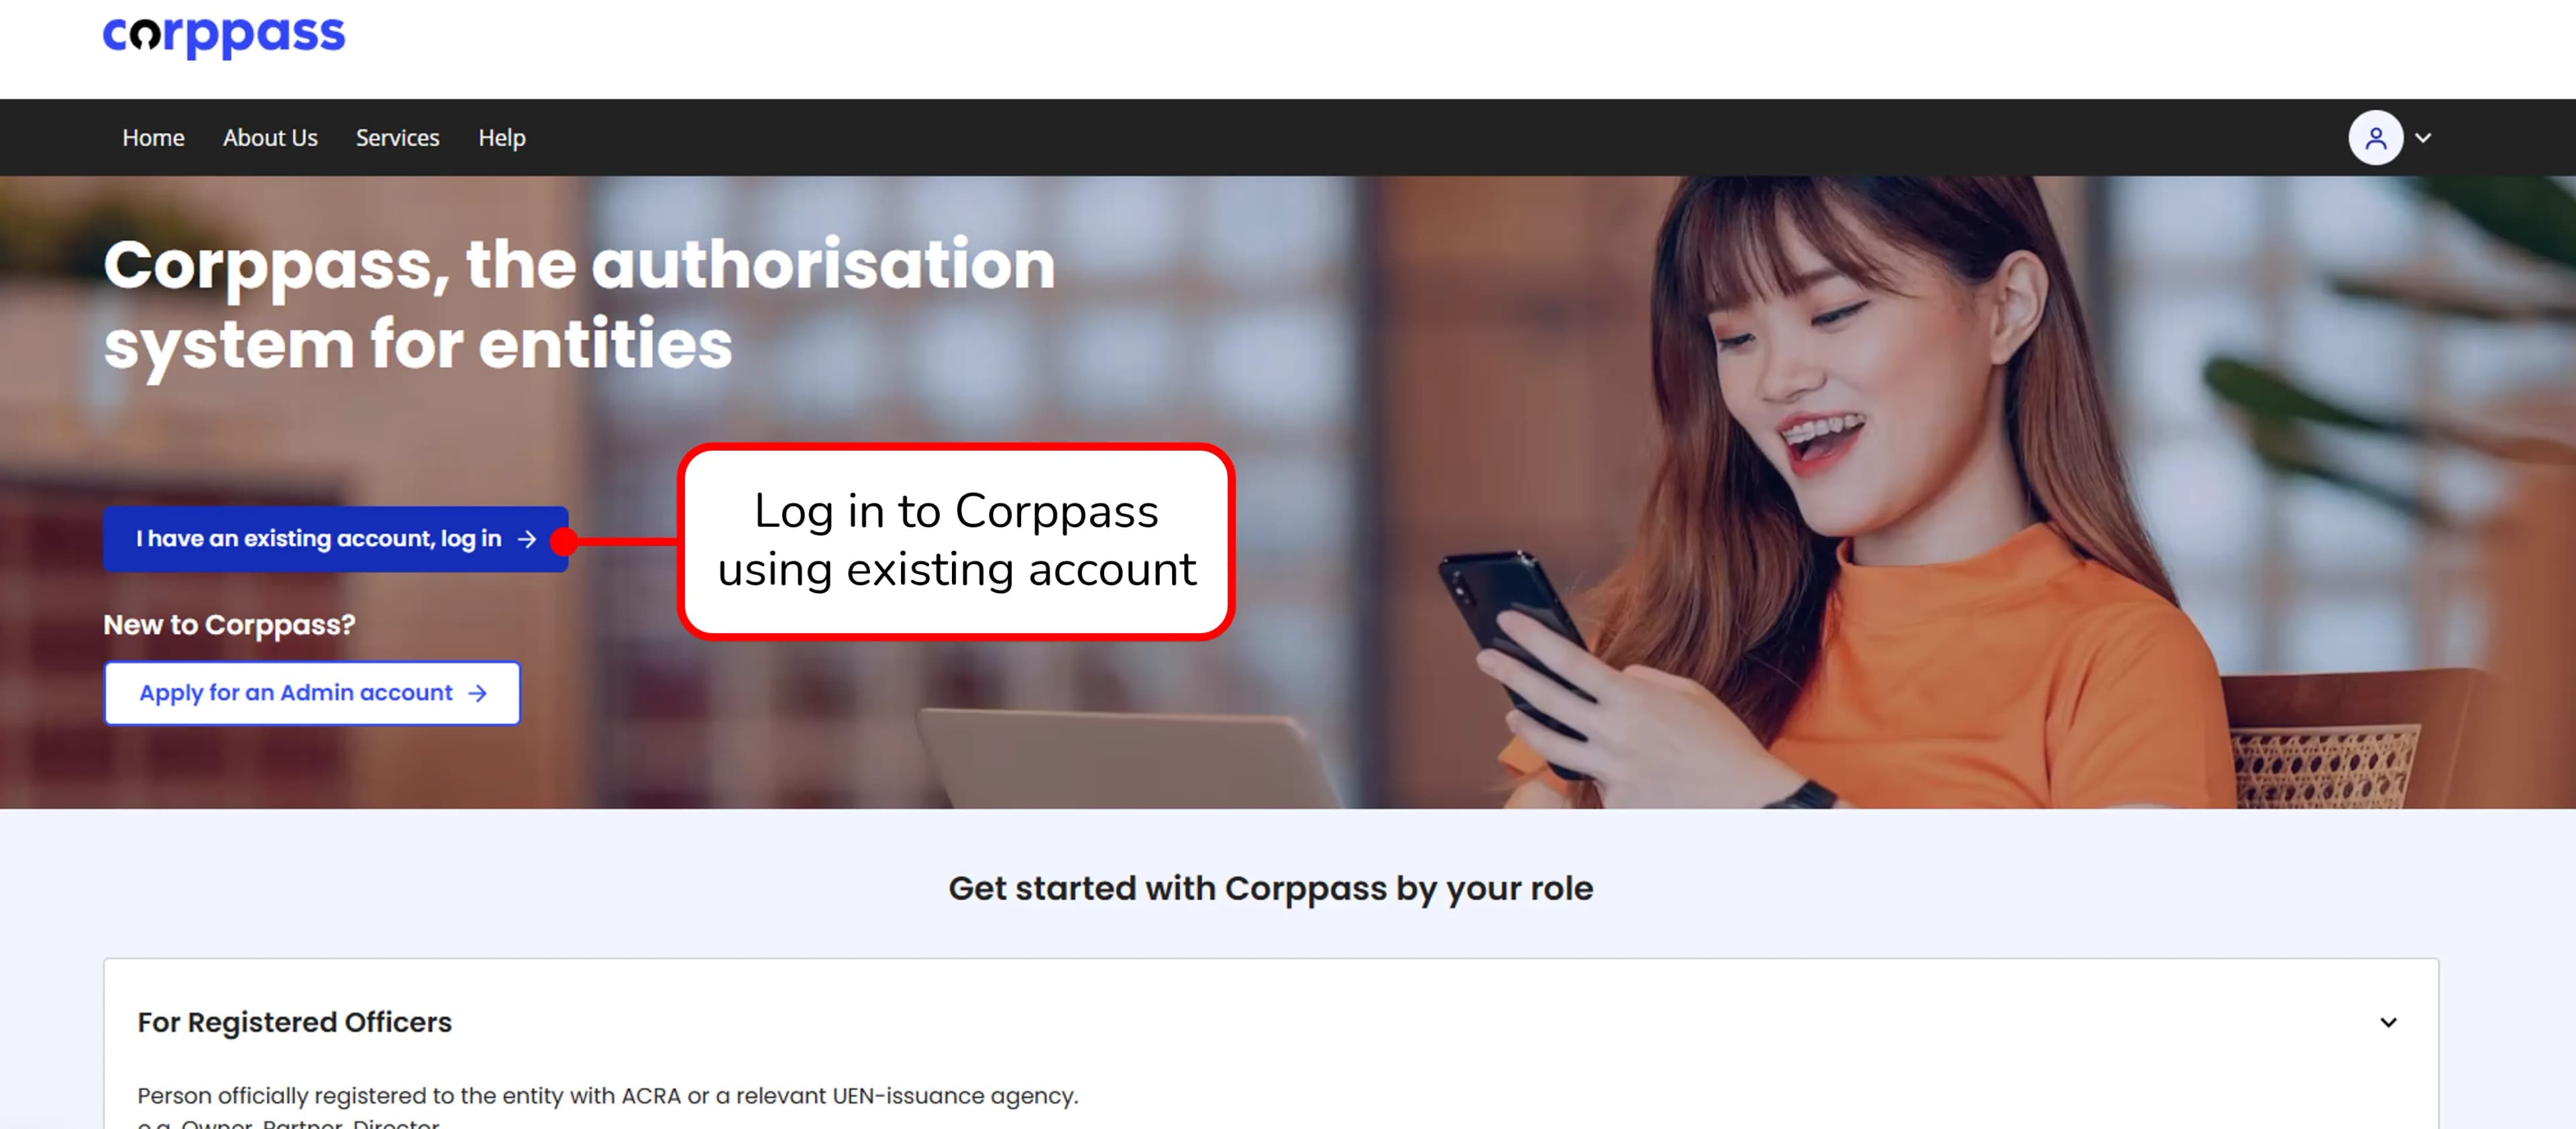
Log in to Corppass
On the Corppass homepage, click on "I have an existing account, log in" to log in using your existing account.
2
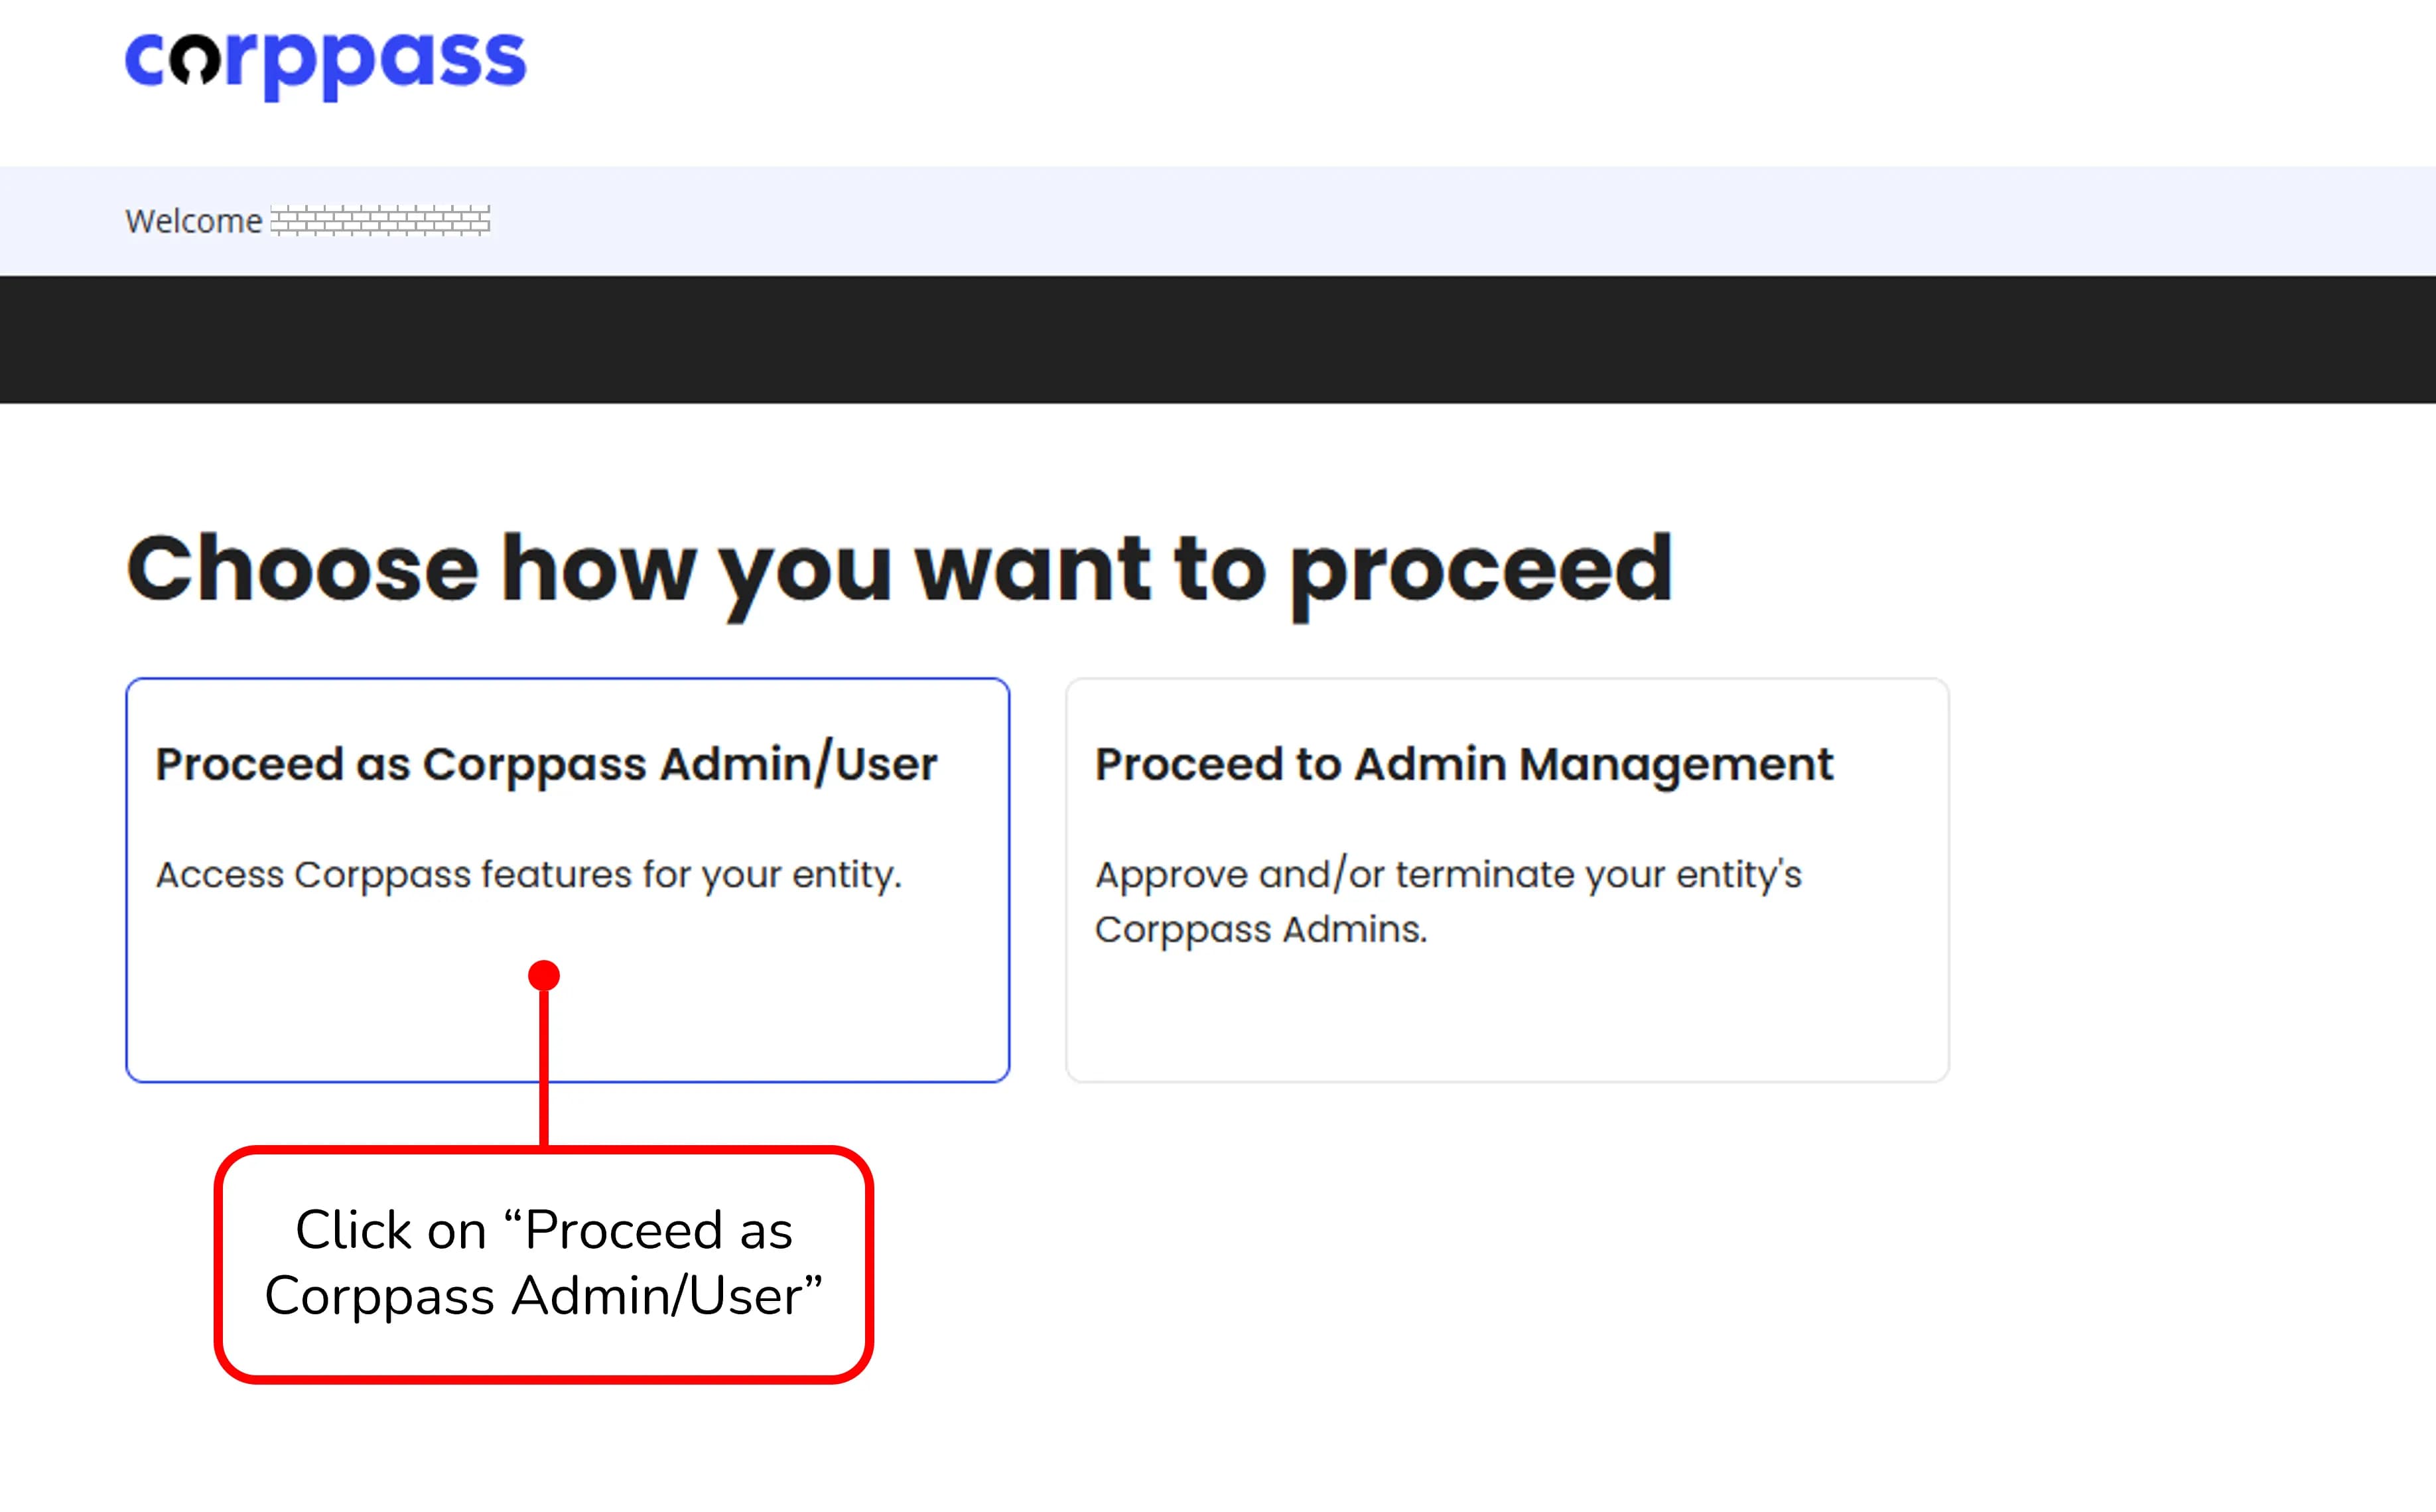
Proceed as Corppass Admin/User
On the choice screen, click on the "Proceed as Corppass Admin/User" box to access features for your entity.
3
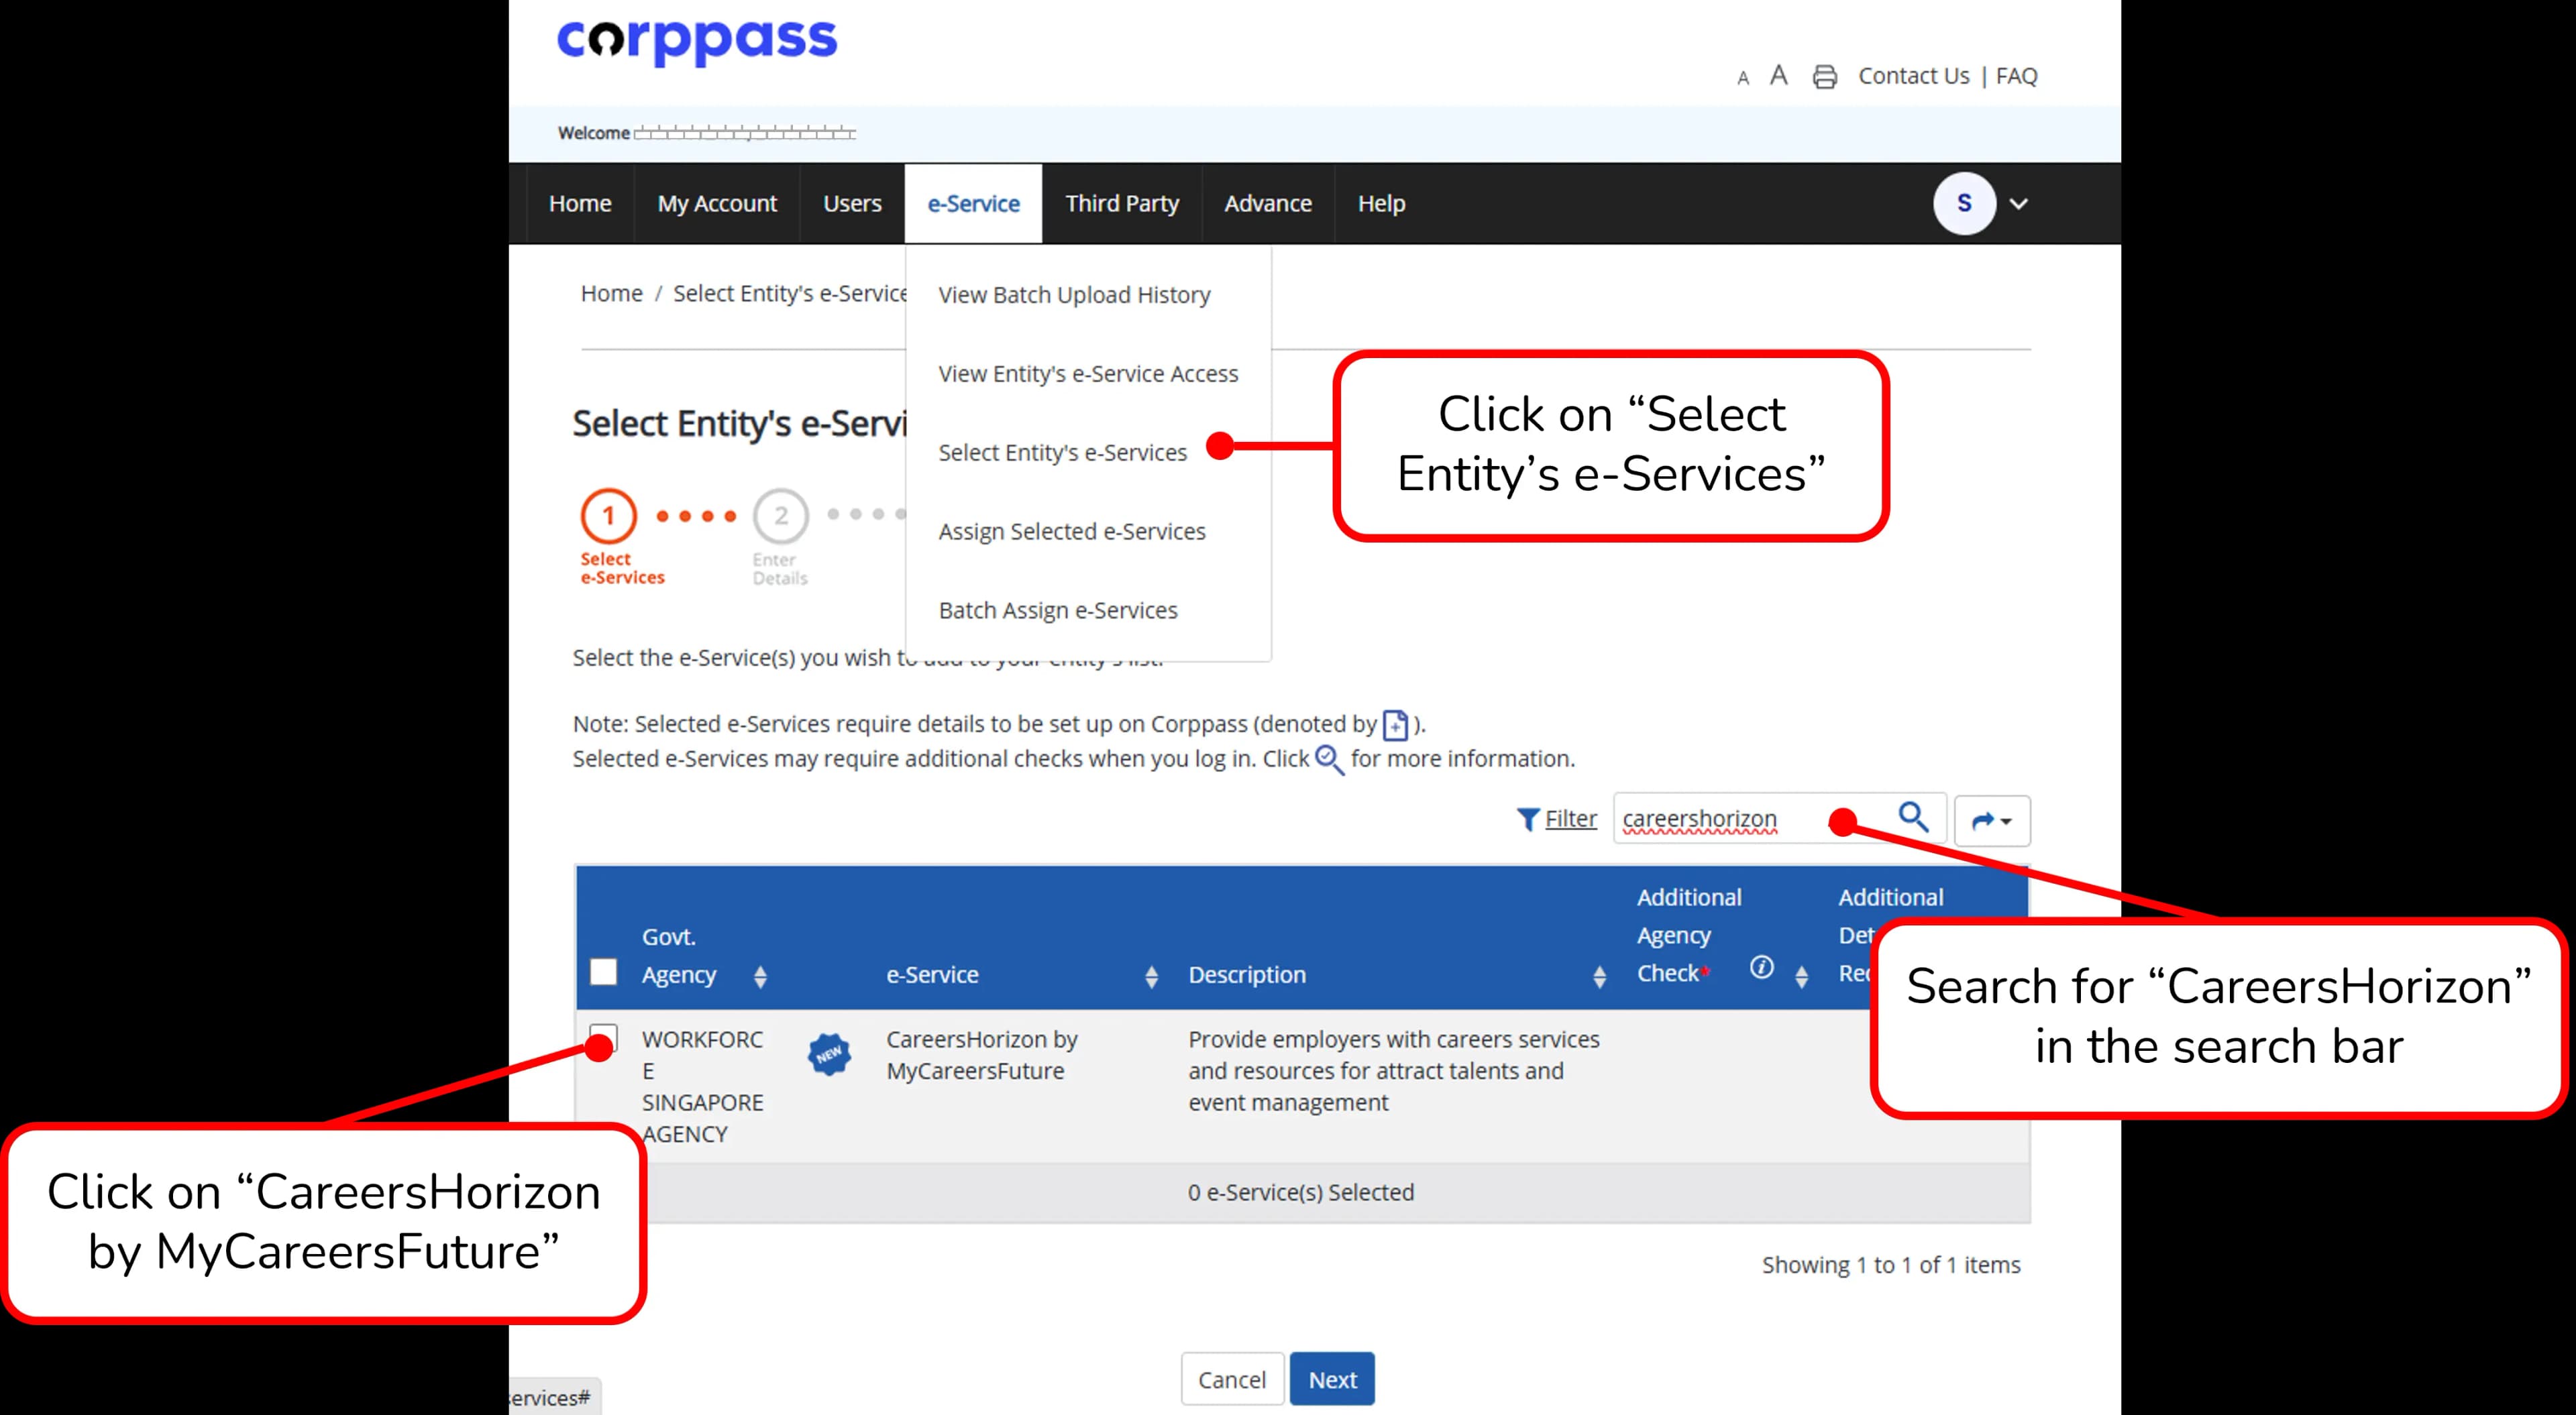
Select Entity's e-Services
From the top menu under the "e-Service" tab, click on "Select Entity's e-Services". Search for "CareersHorizon" in the search bar, and check the box for "CareersHorizon by MyCareersFuture".
4
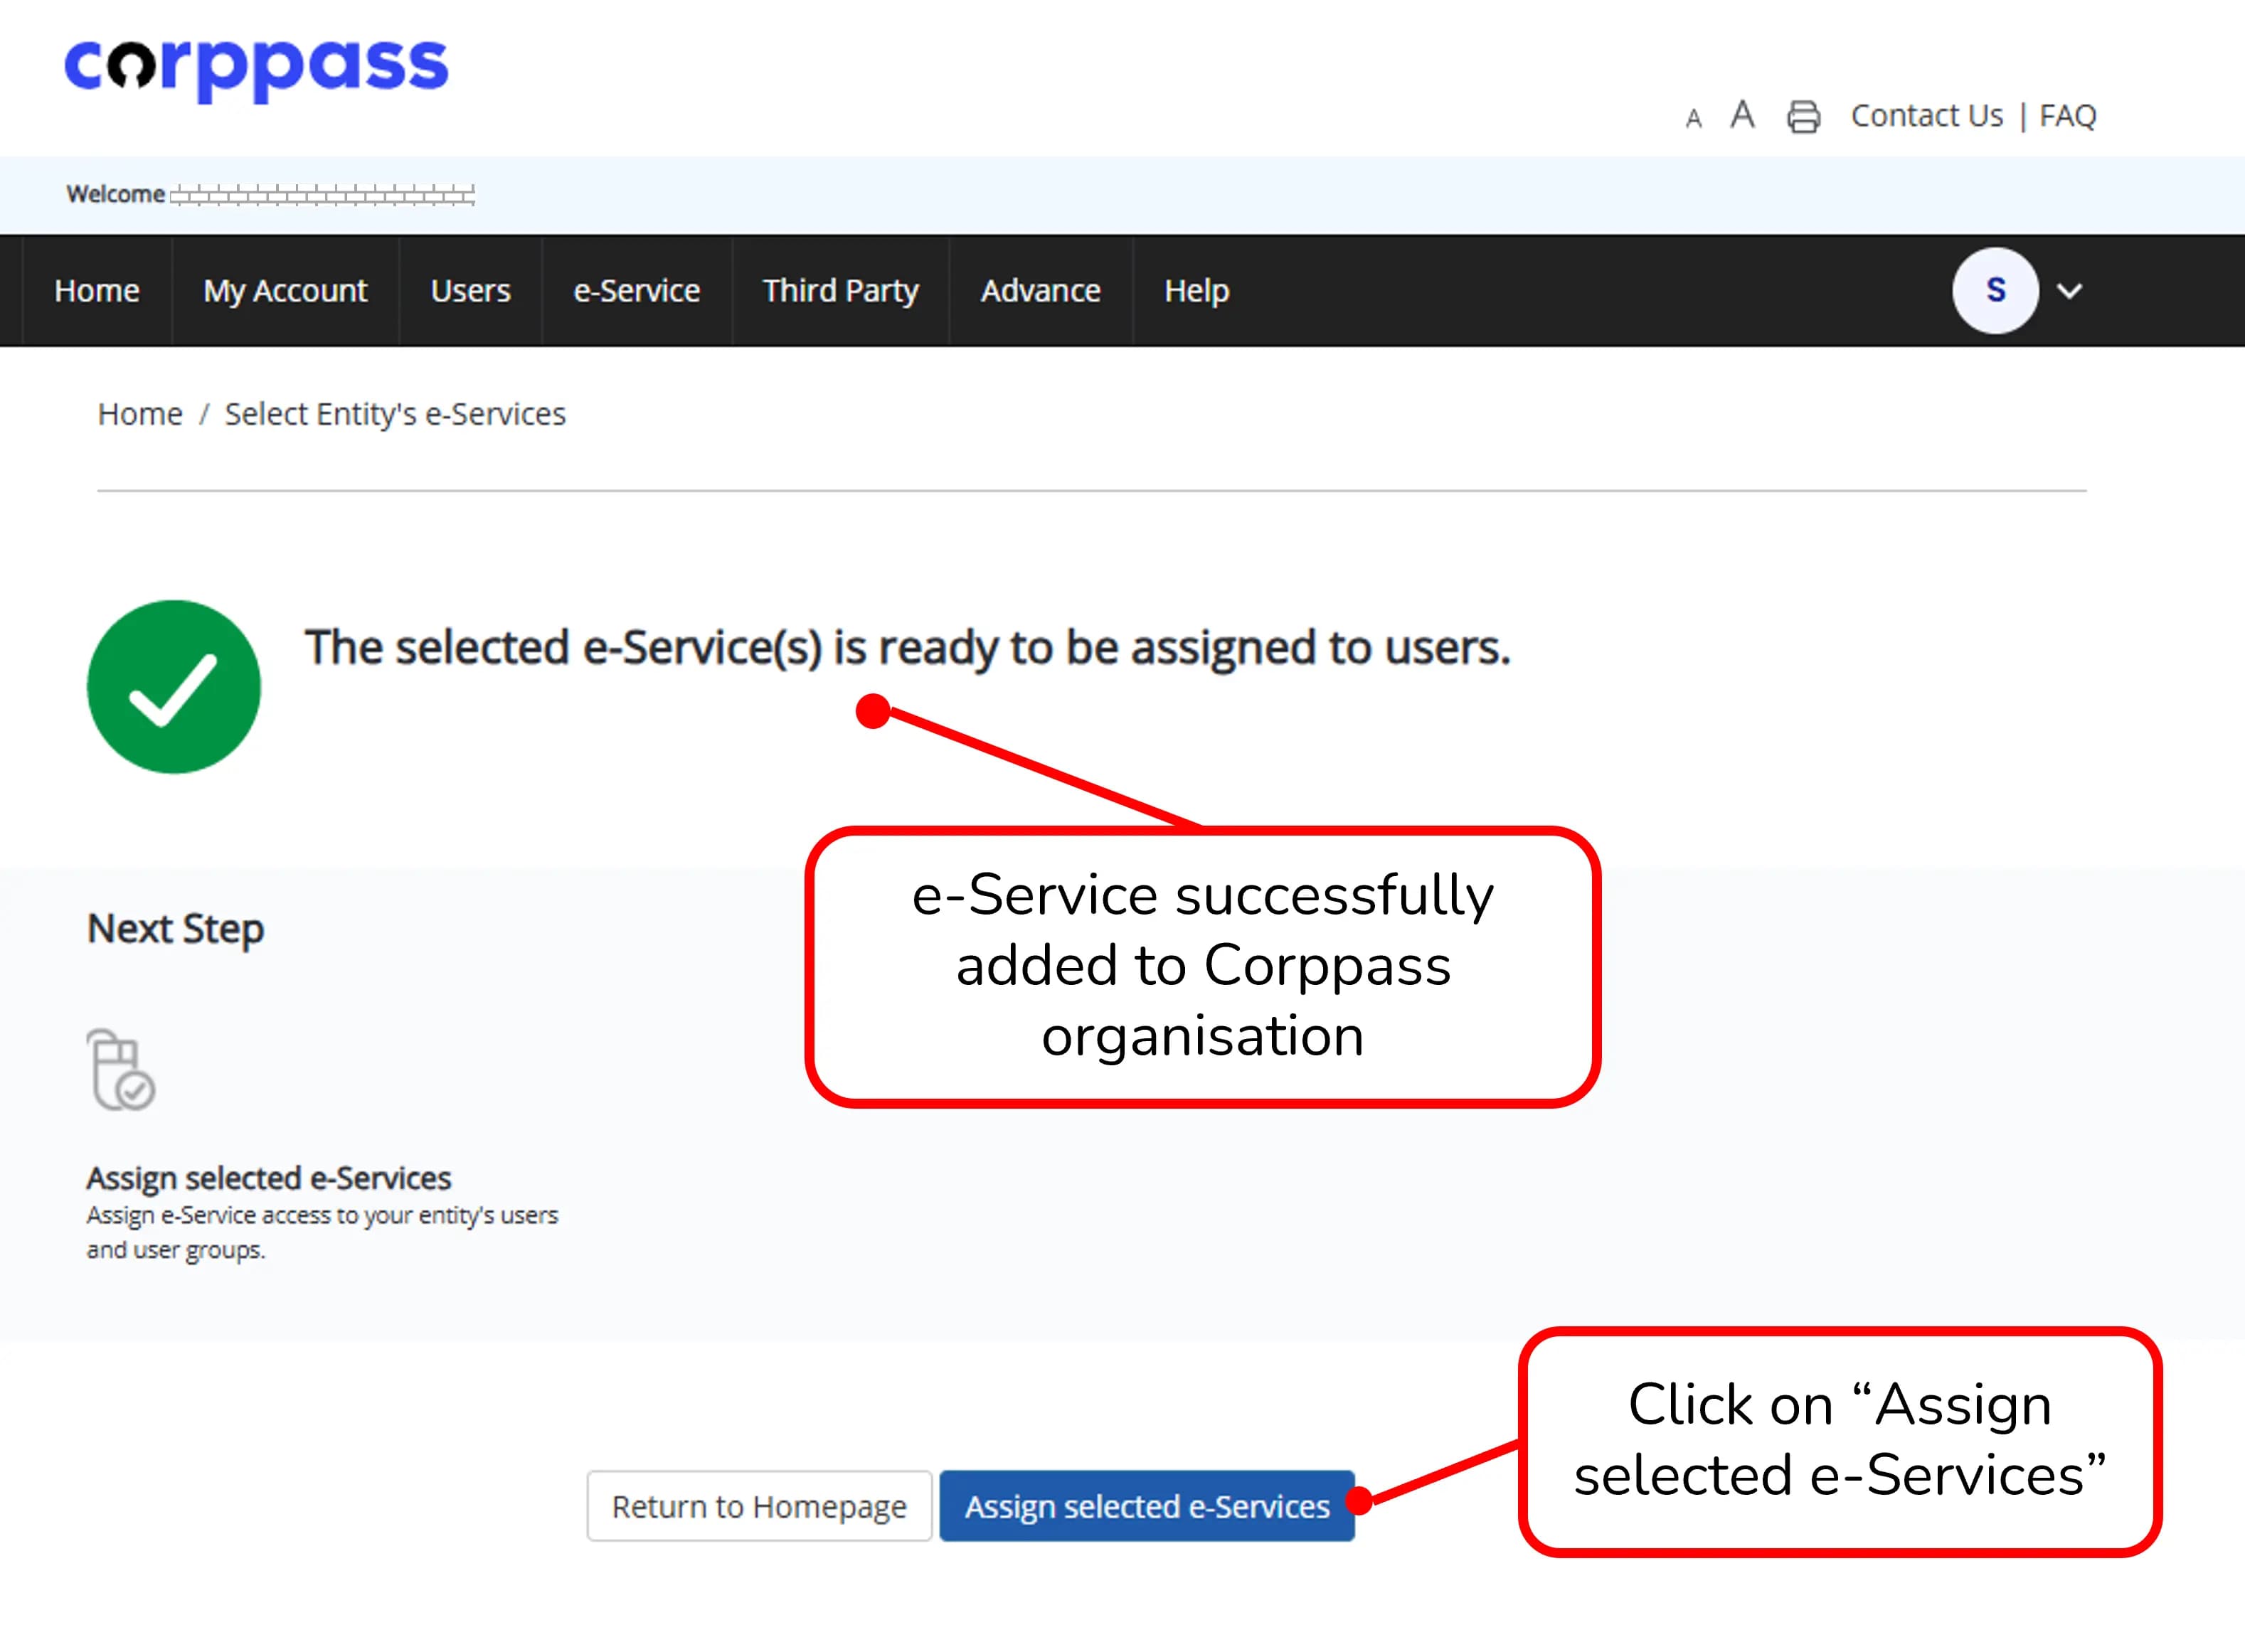
Assign Selected e-Services
Once the screen indicates the e-Service is successfully added to your Corppass organisation, click on the "Assign selected e-Services" button.
Part 2: Assigning CareersHorizon to Users
For Entity Admins/Sub-Admins: Grant individual employees access to the 'CareersHorizon' e-Service.
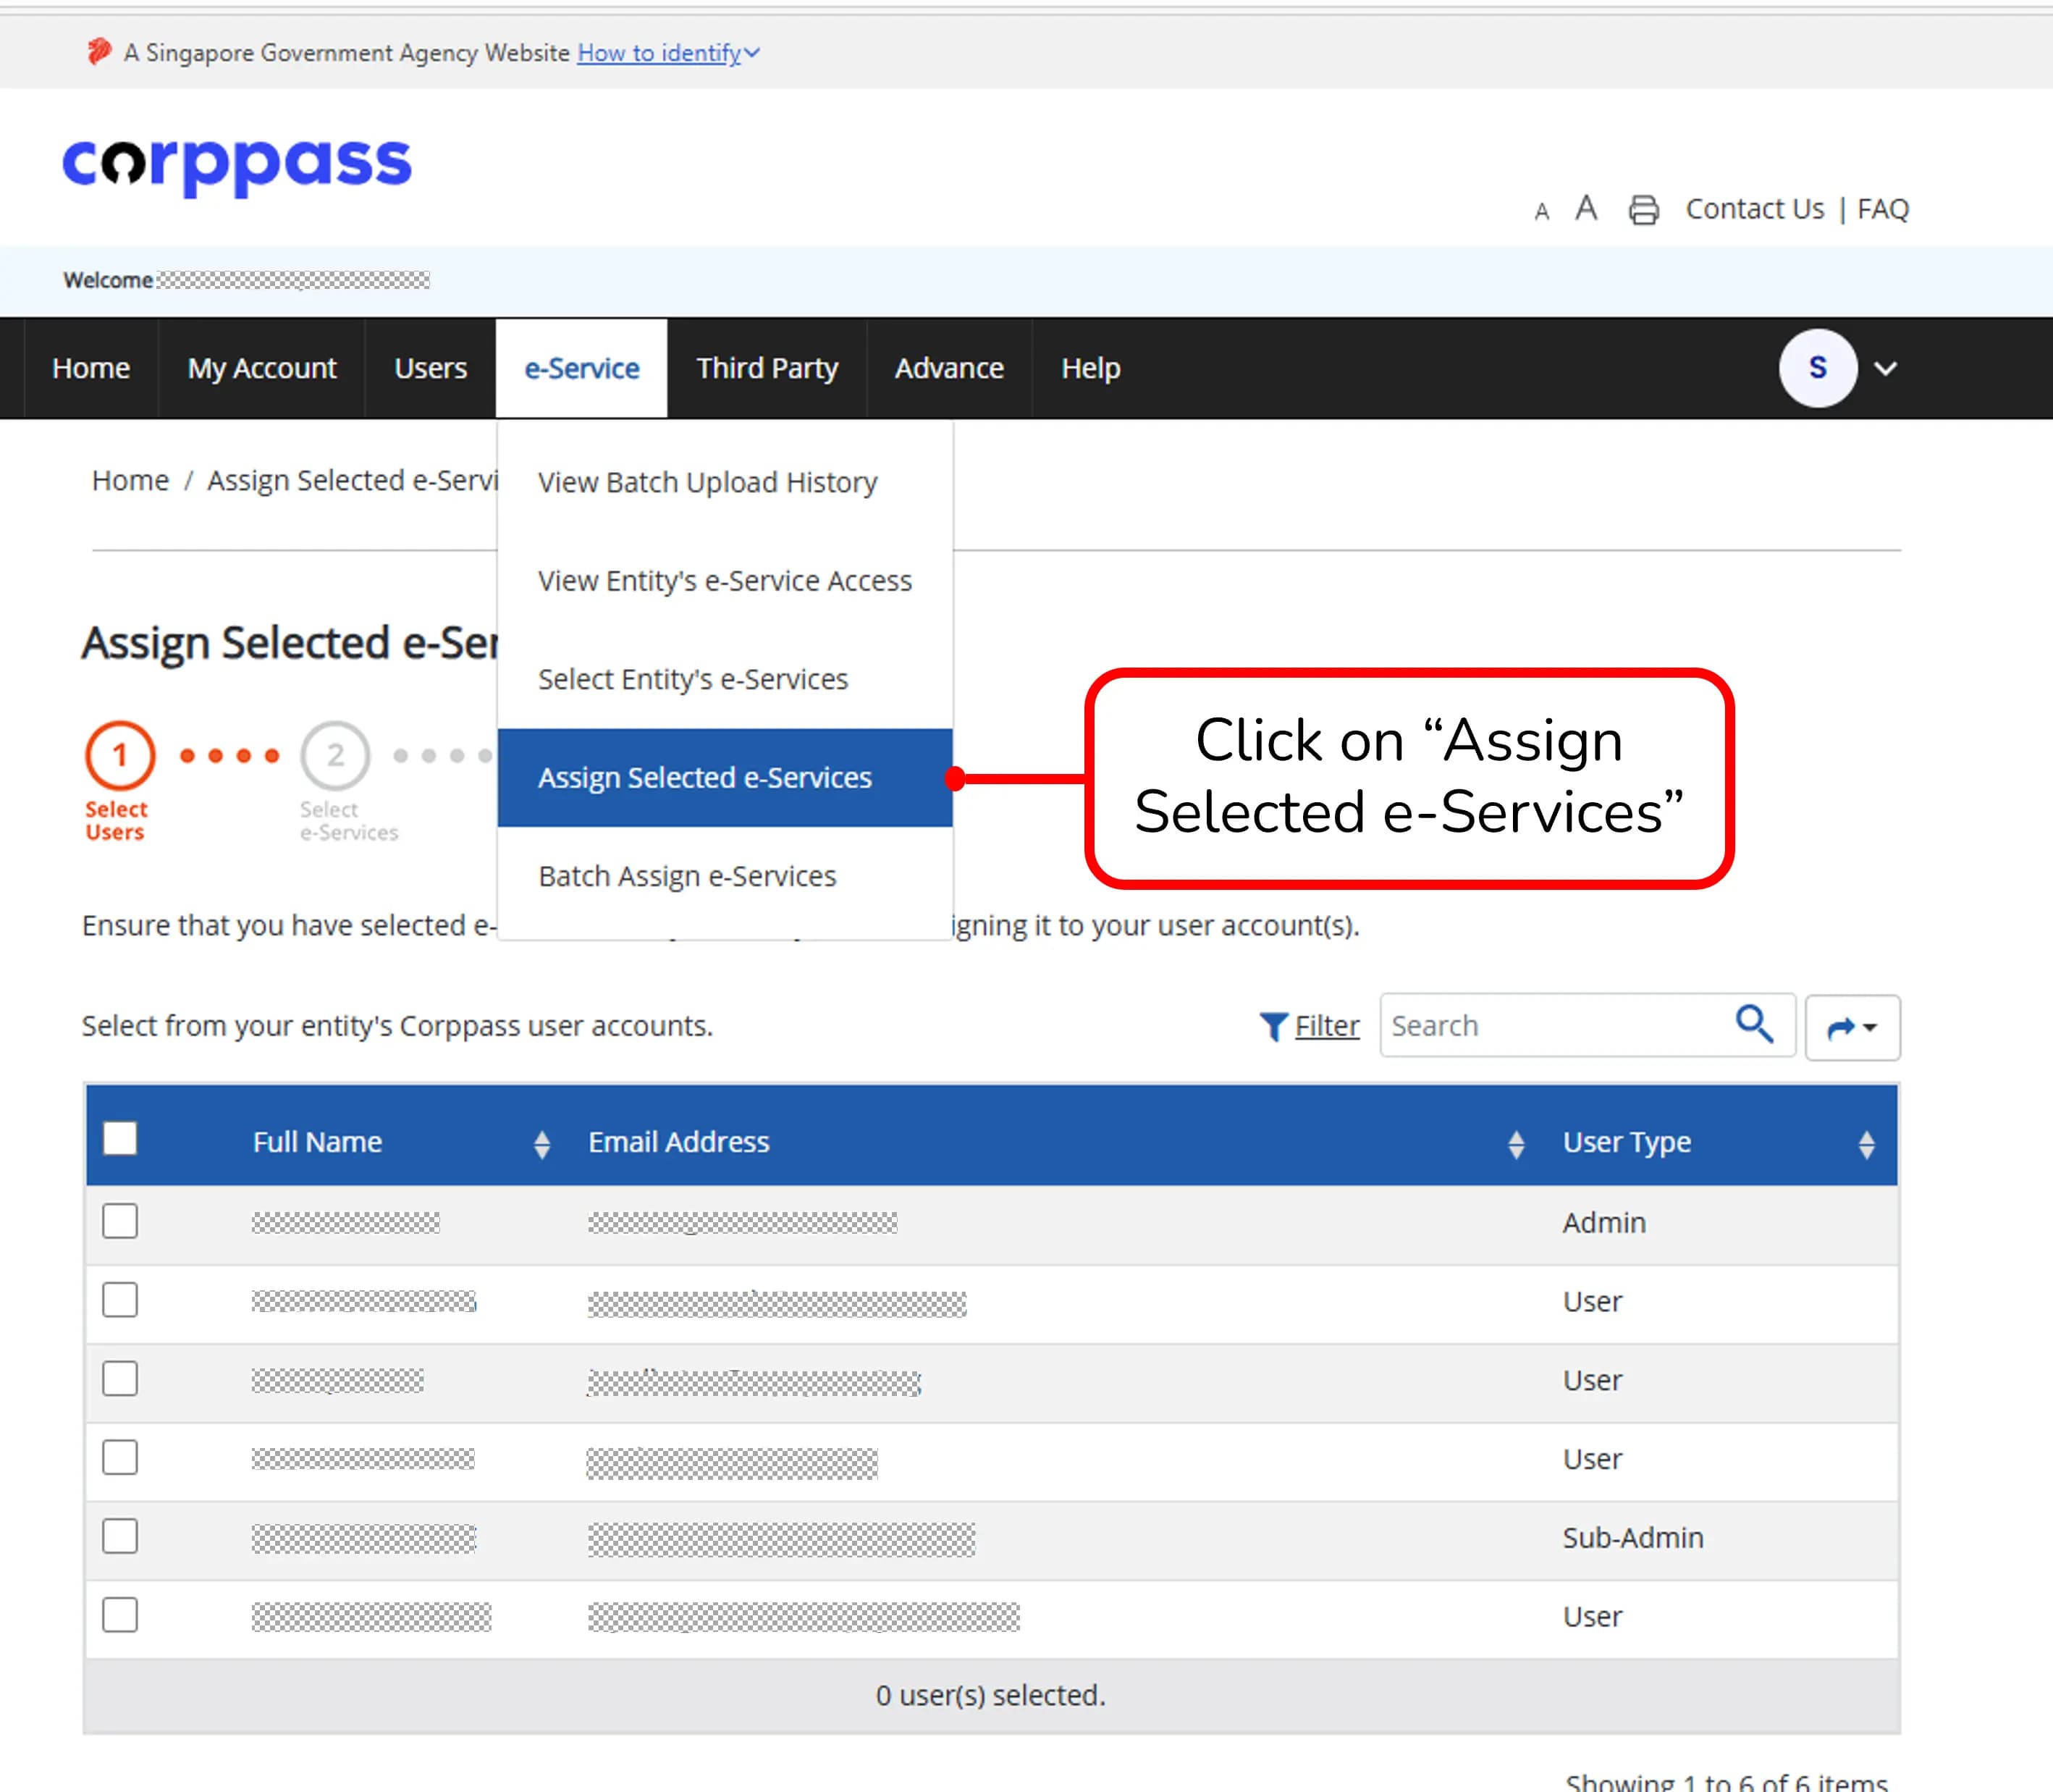
5
Navigate to Assign Selected e-Service (From the menu bar)
To begin assigning users, navigate to the "e-Service" tab in the top menu and click on "Assign Selected e-Services".
6
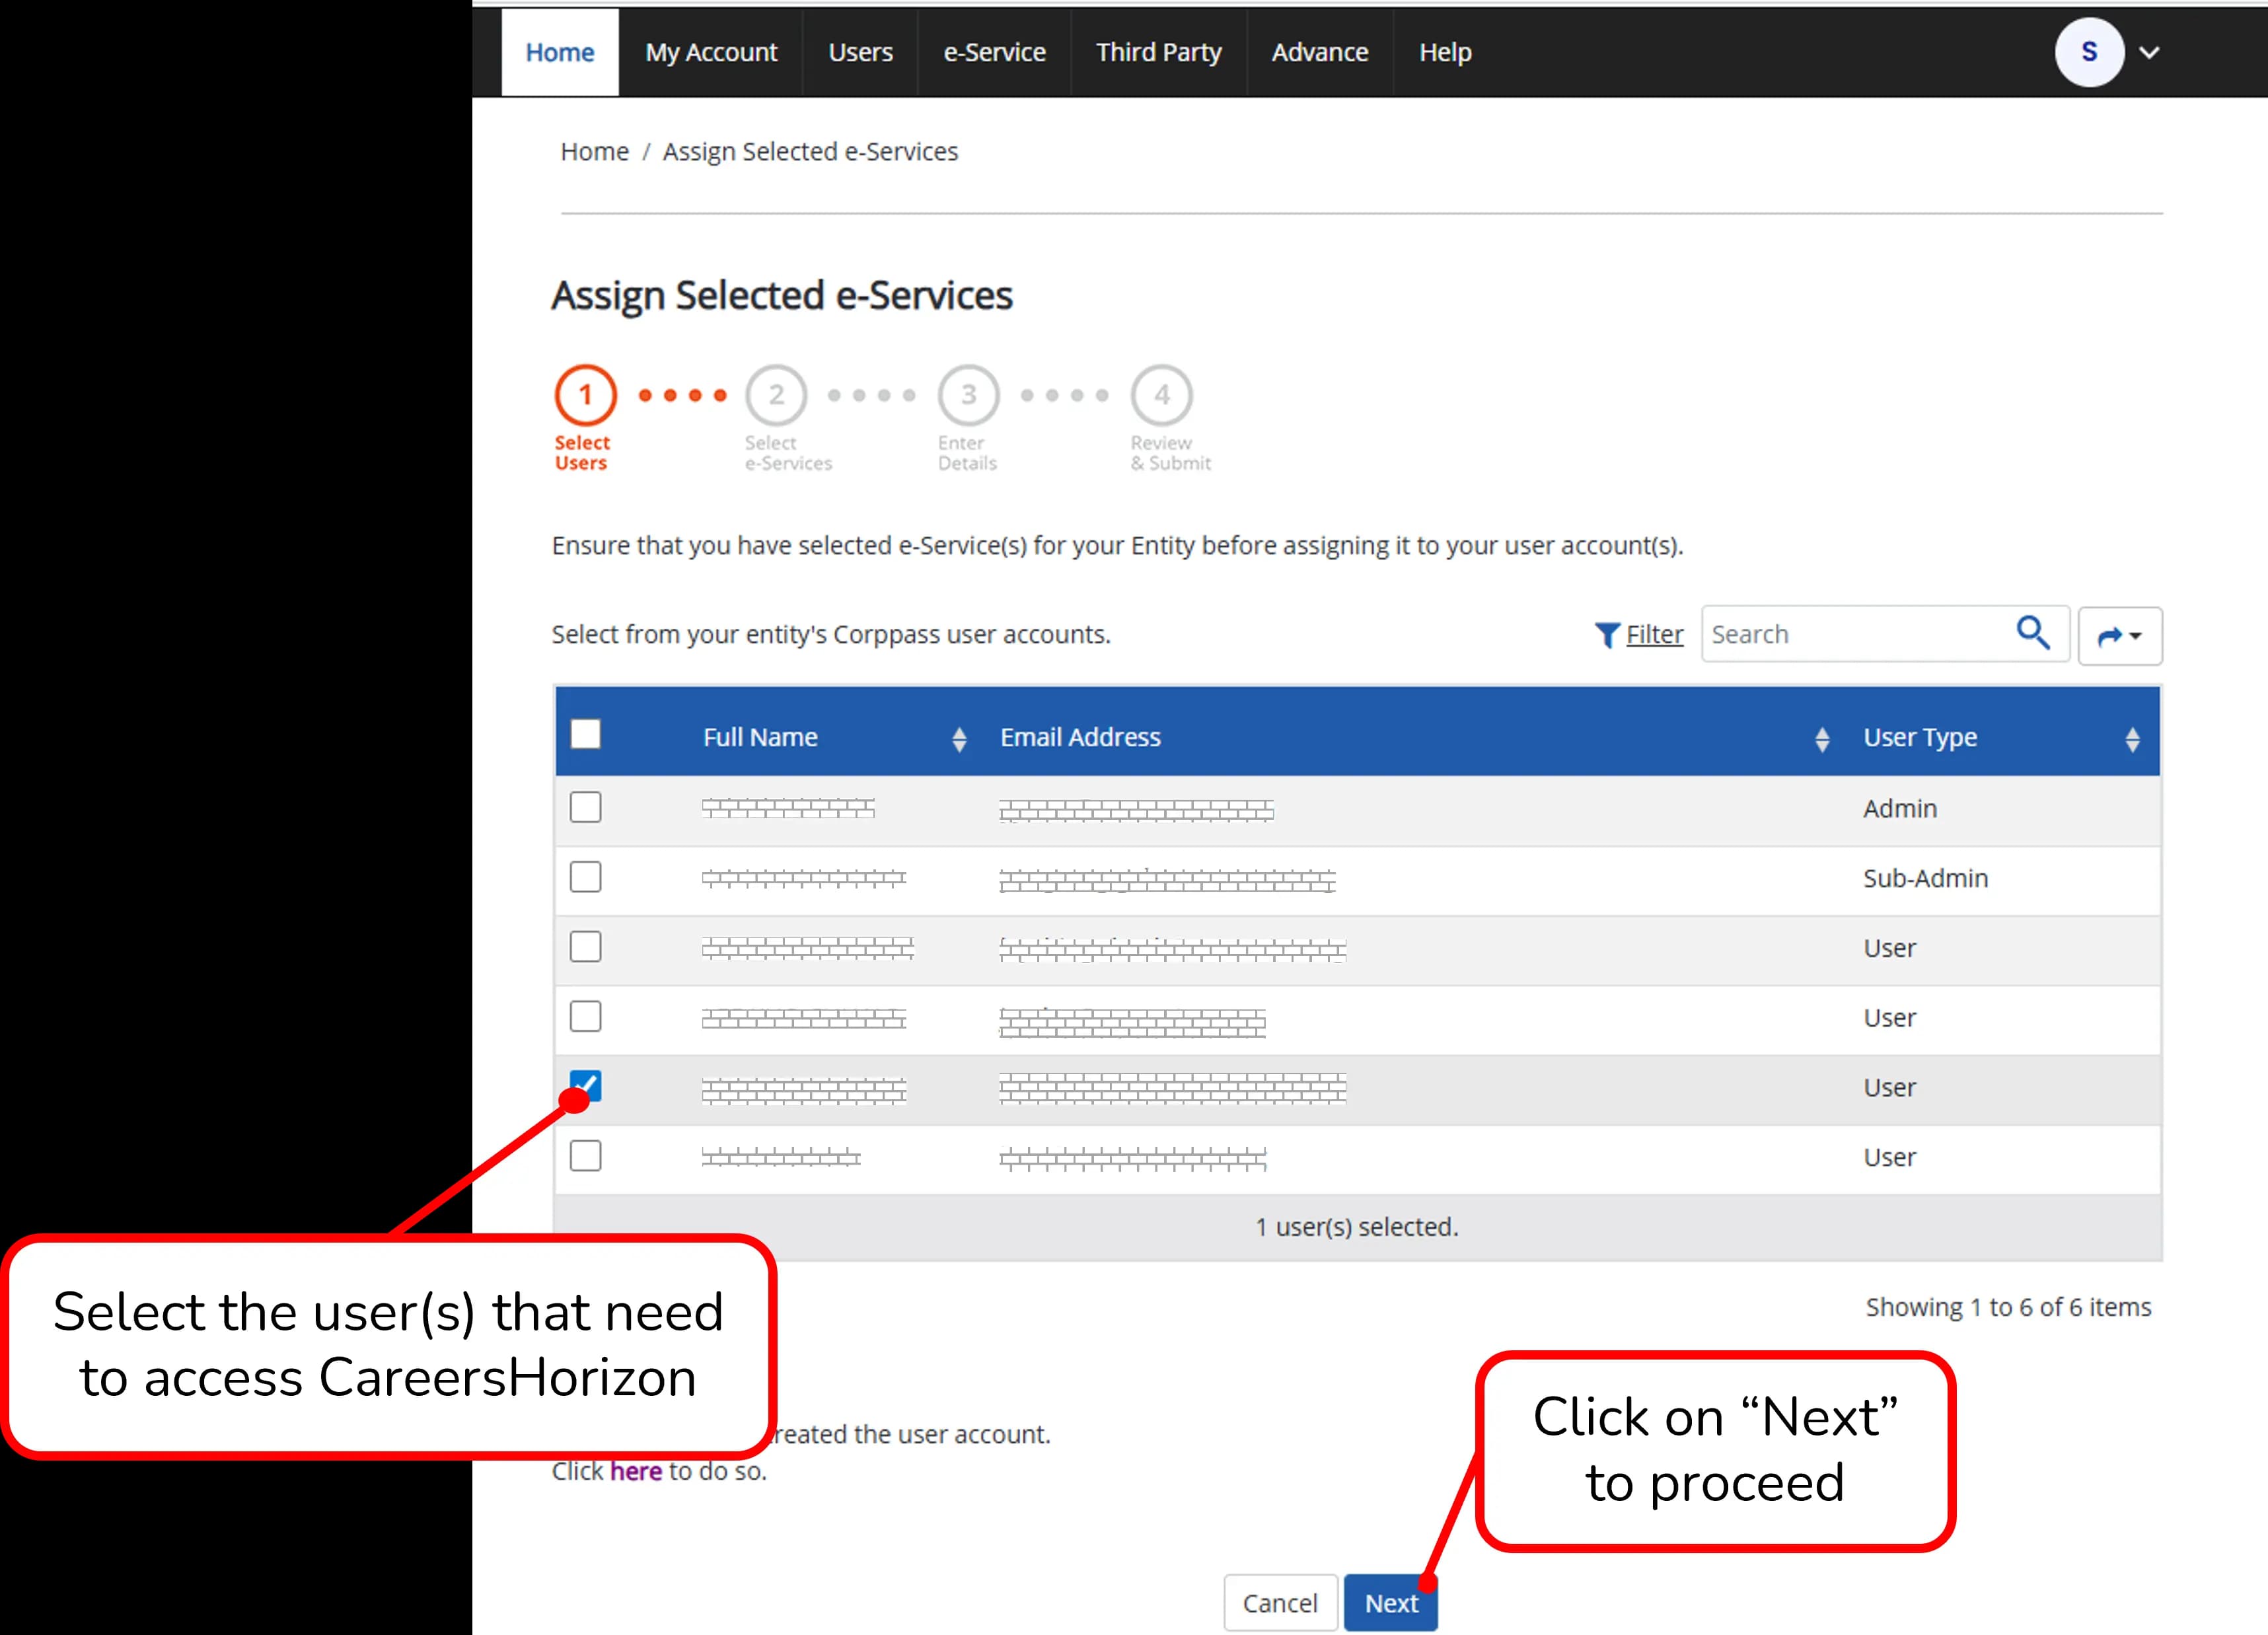
Select Users
Under the "Select Users" stage, select the user(s) that need to access CareersHorizon by checking the boxes next to their names, then click on "Next" to proceed.
7
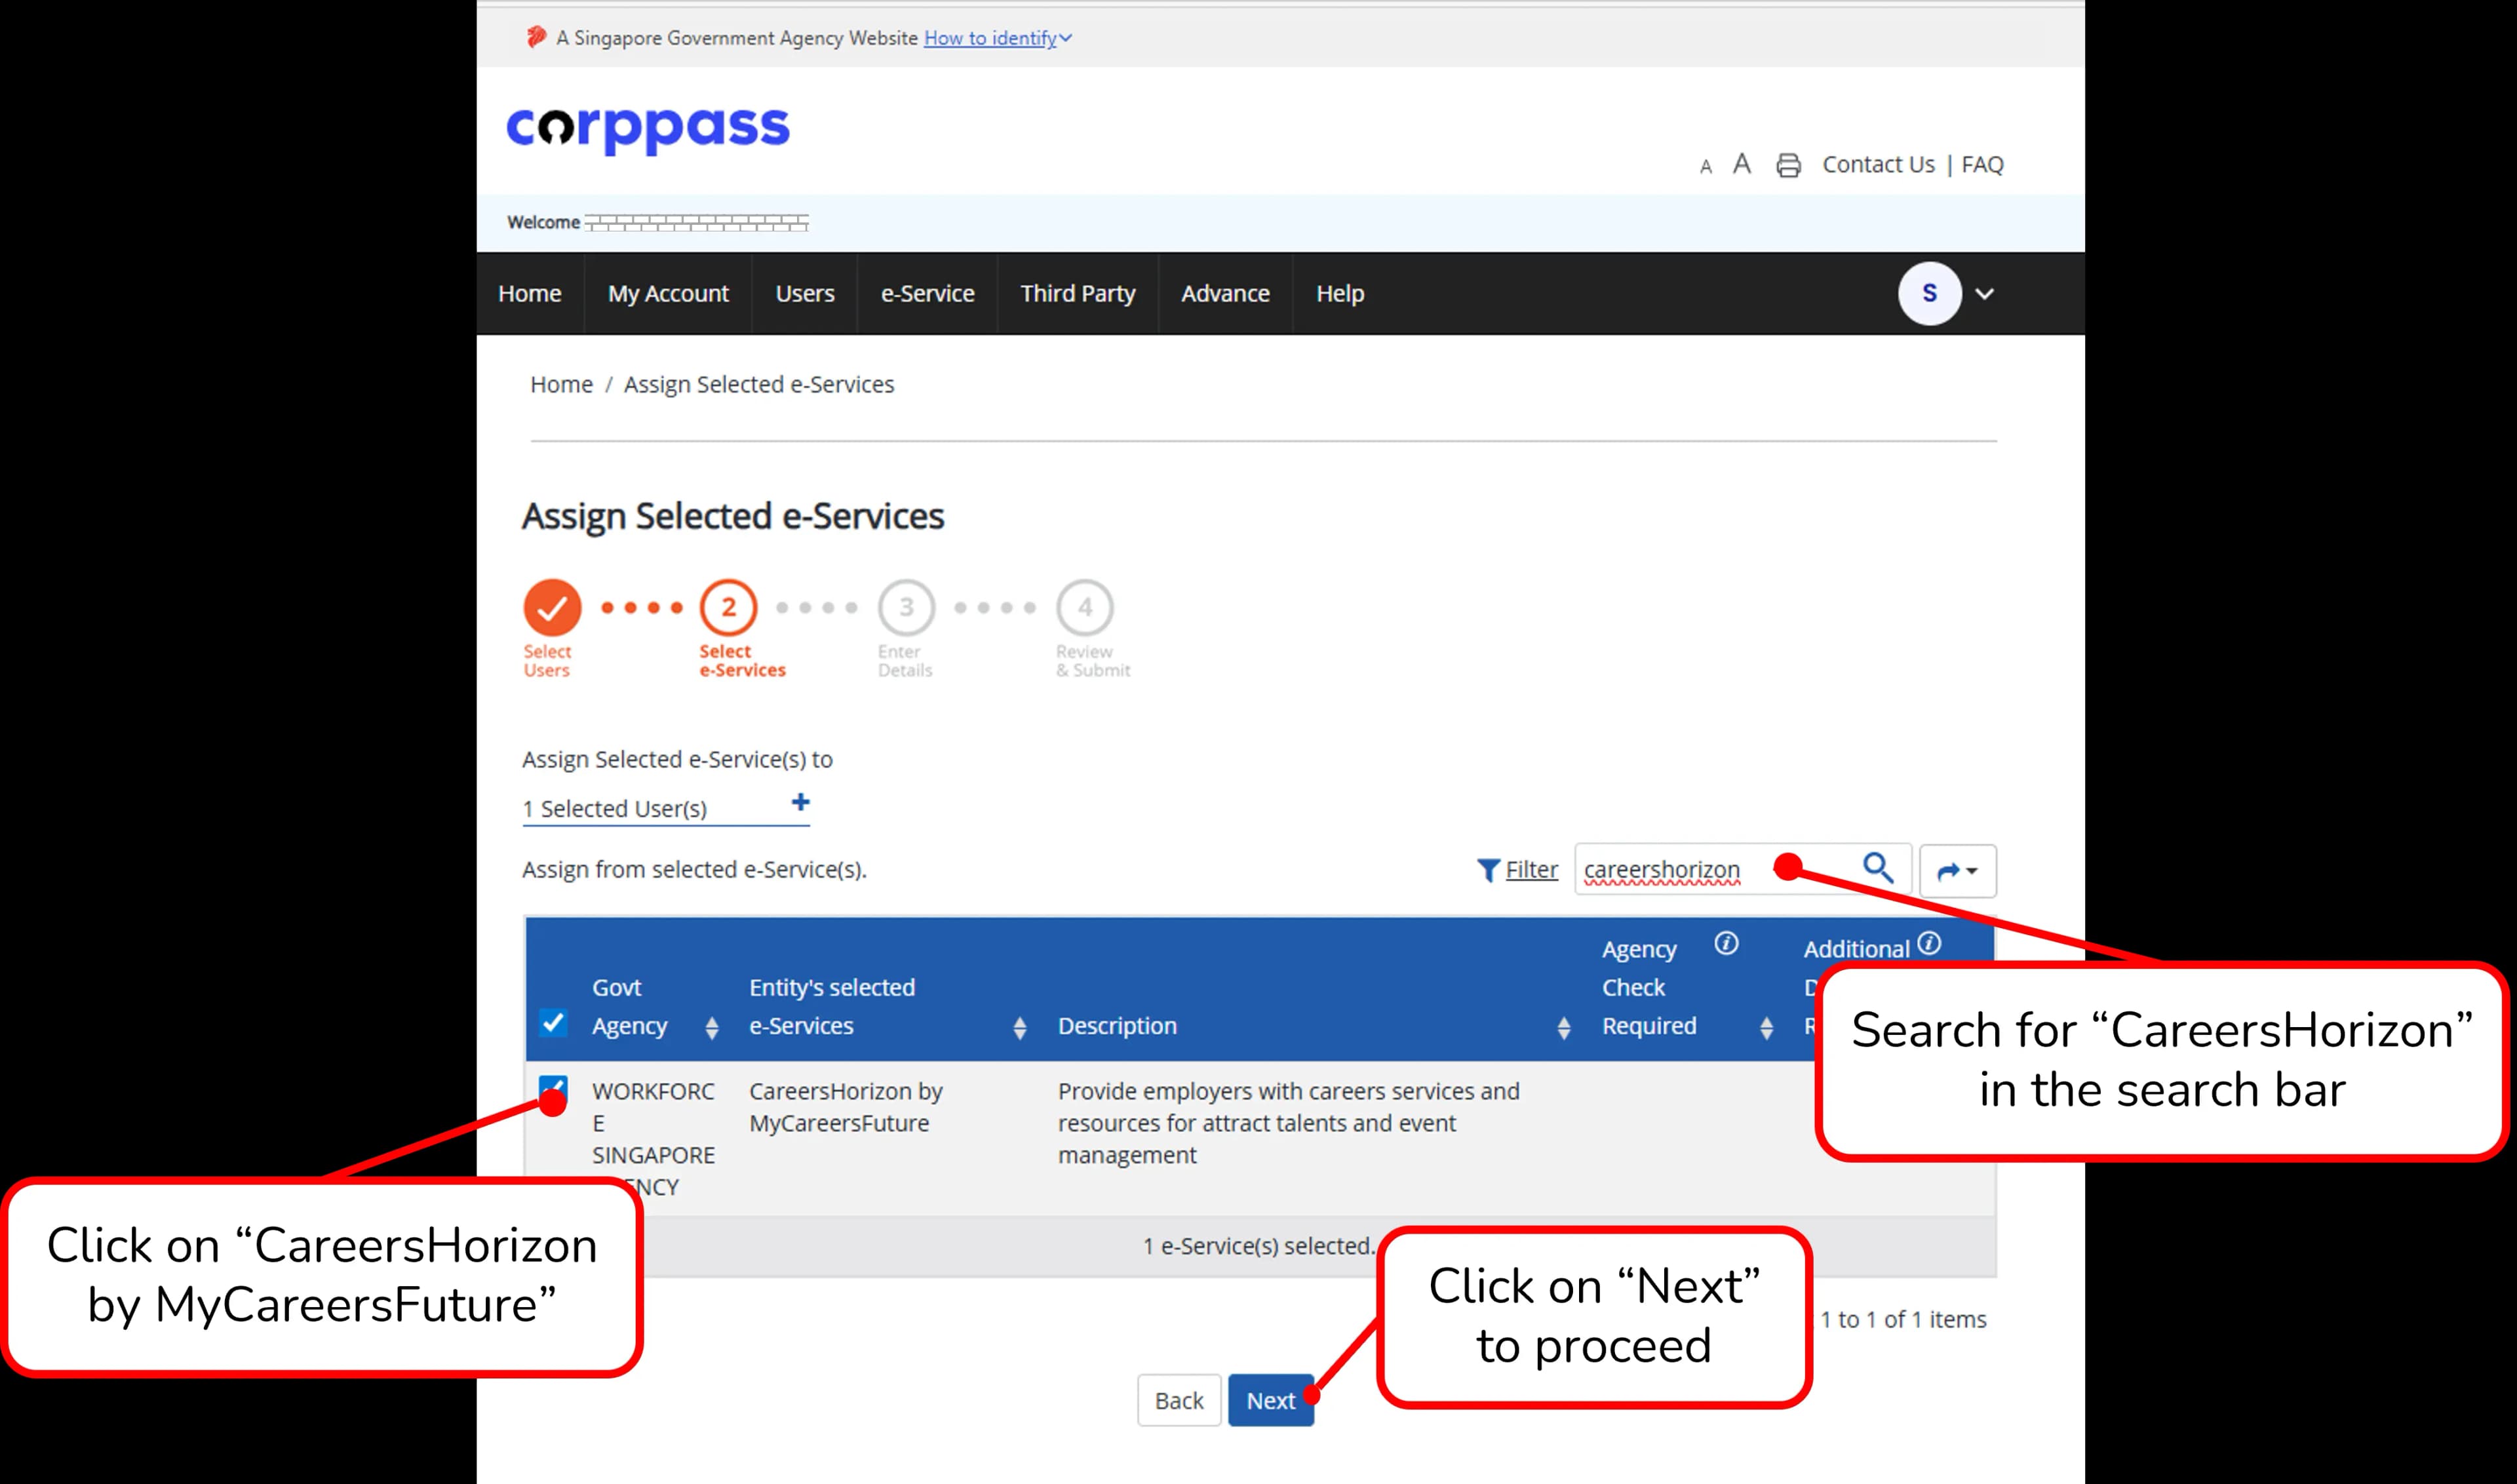
Select e-Services
Under the "Select e-Services" stage, search for "CareersHorizon" in the search bar again, check the box for "CareersHorizon by MyCareersFuture", and click on "Next" to proceed.
8
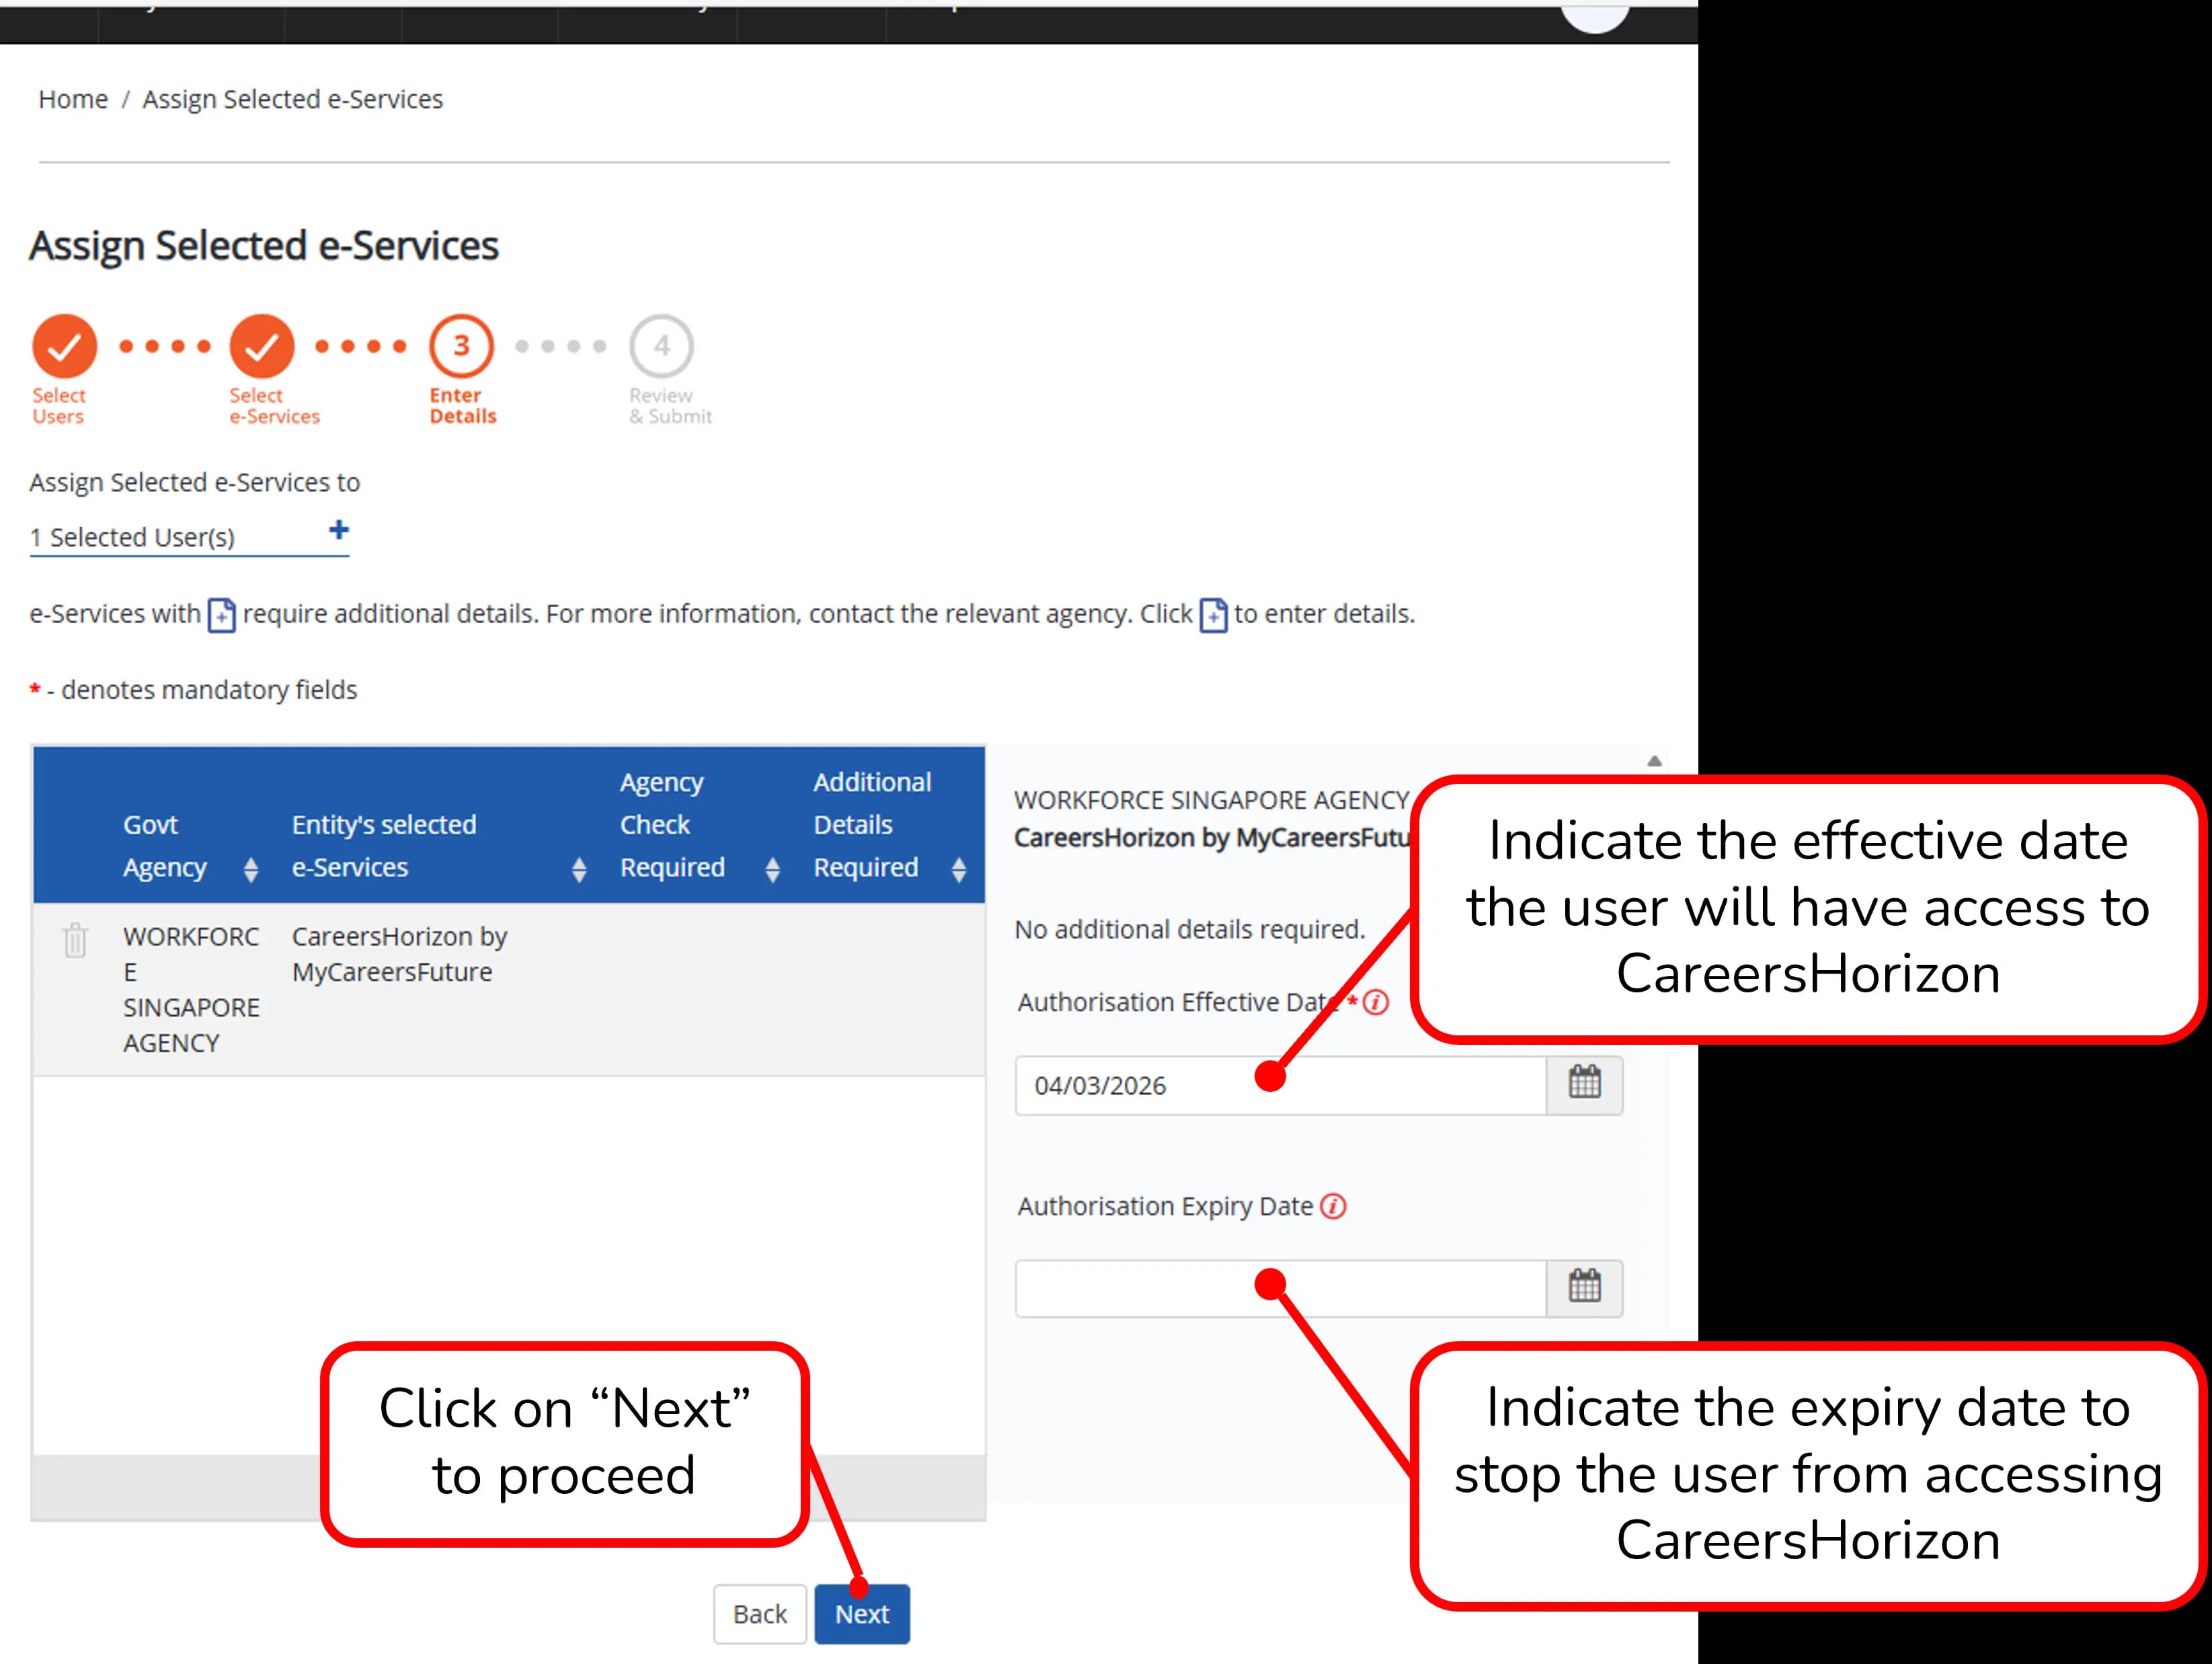
Enter Details
Under the "Enter Details" stage, indicate the Authorisation Effective Date (when the user will have access) and the Authorisation Expiry Date (when access will stop). Click on "Next" to proceed.
9
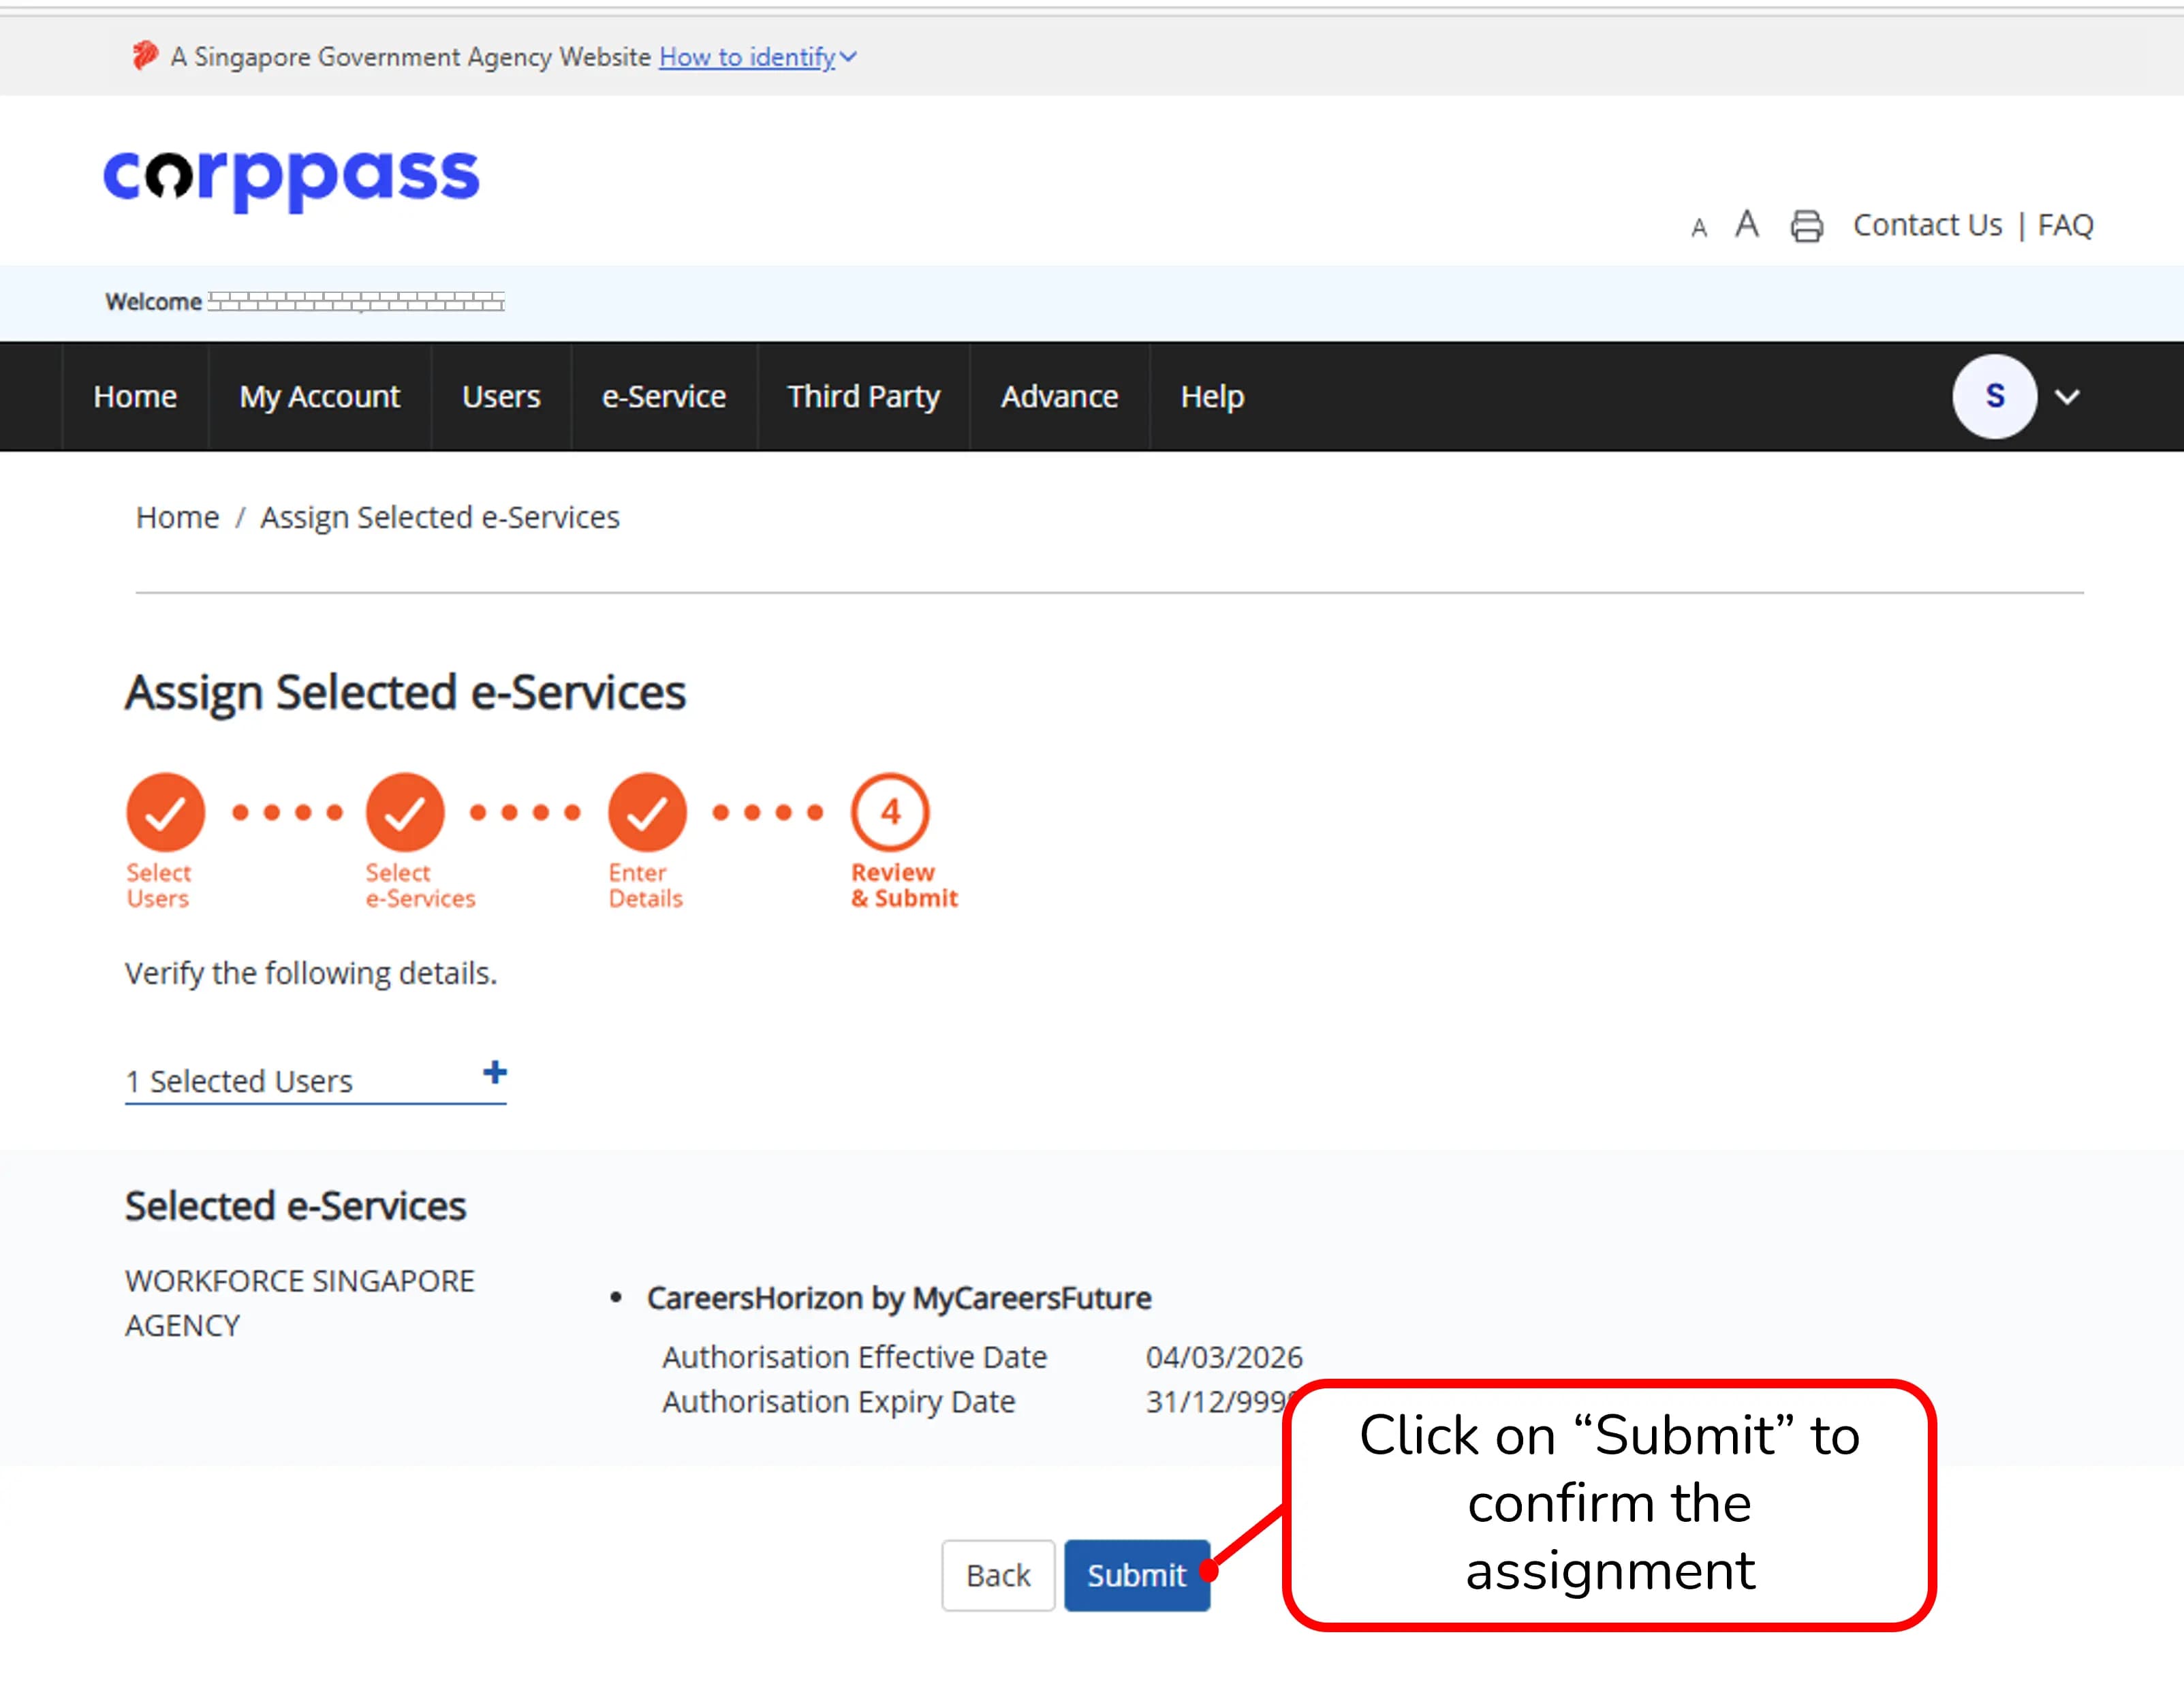
Review & Submit
Under the "Review & Submit" stage, verify all the details are correct, and click on "Submit" to confirm the assignment.
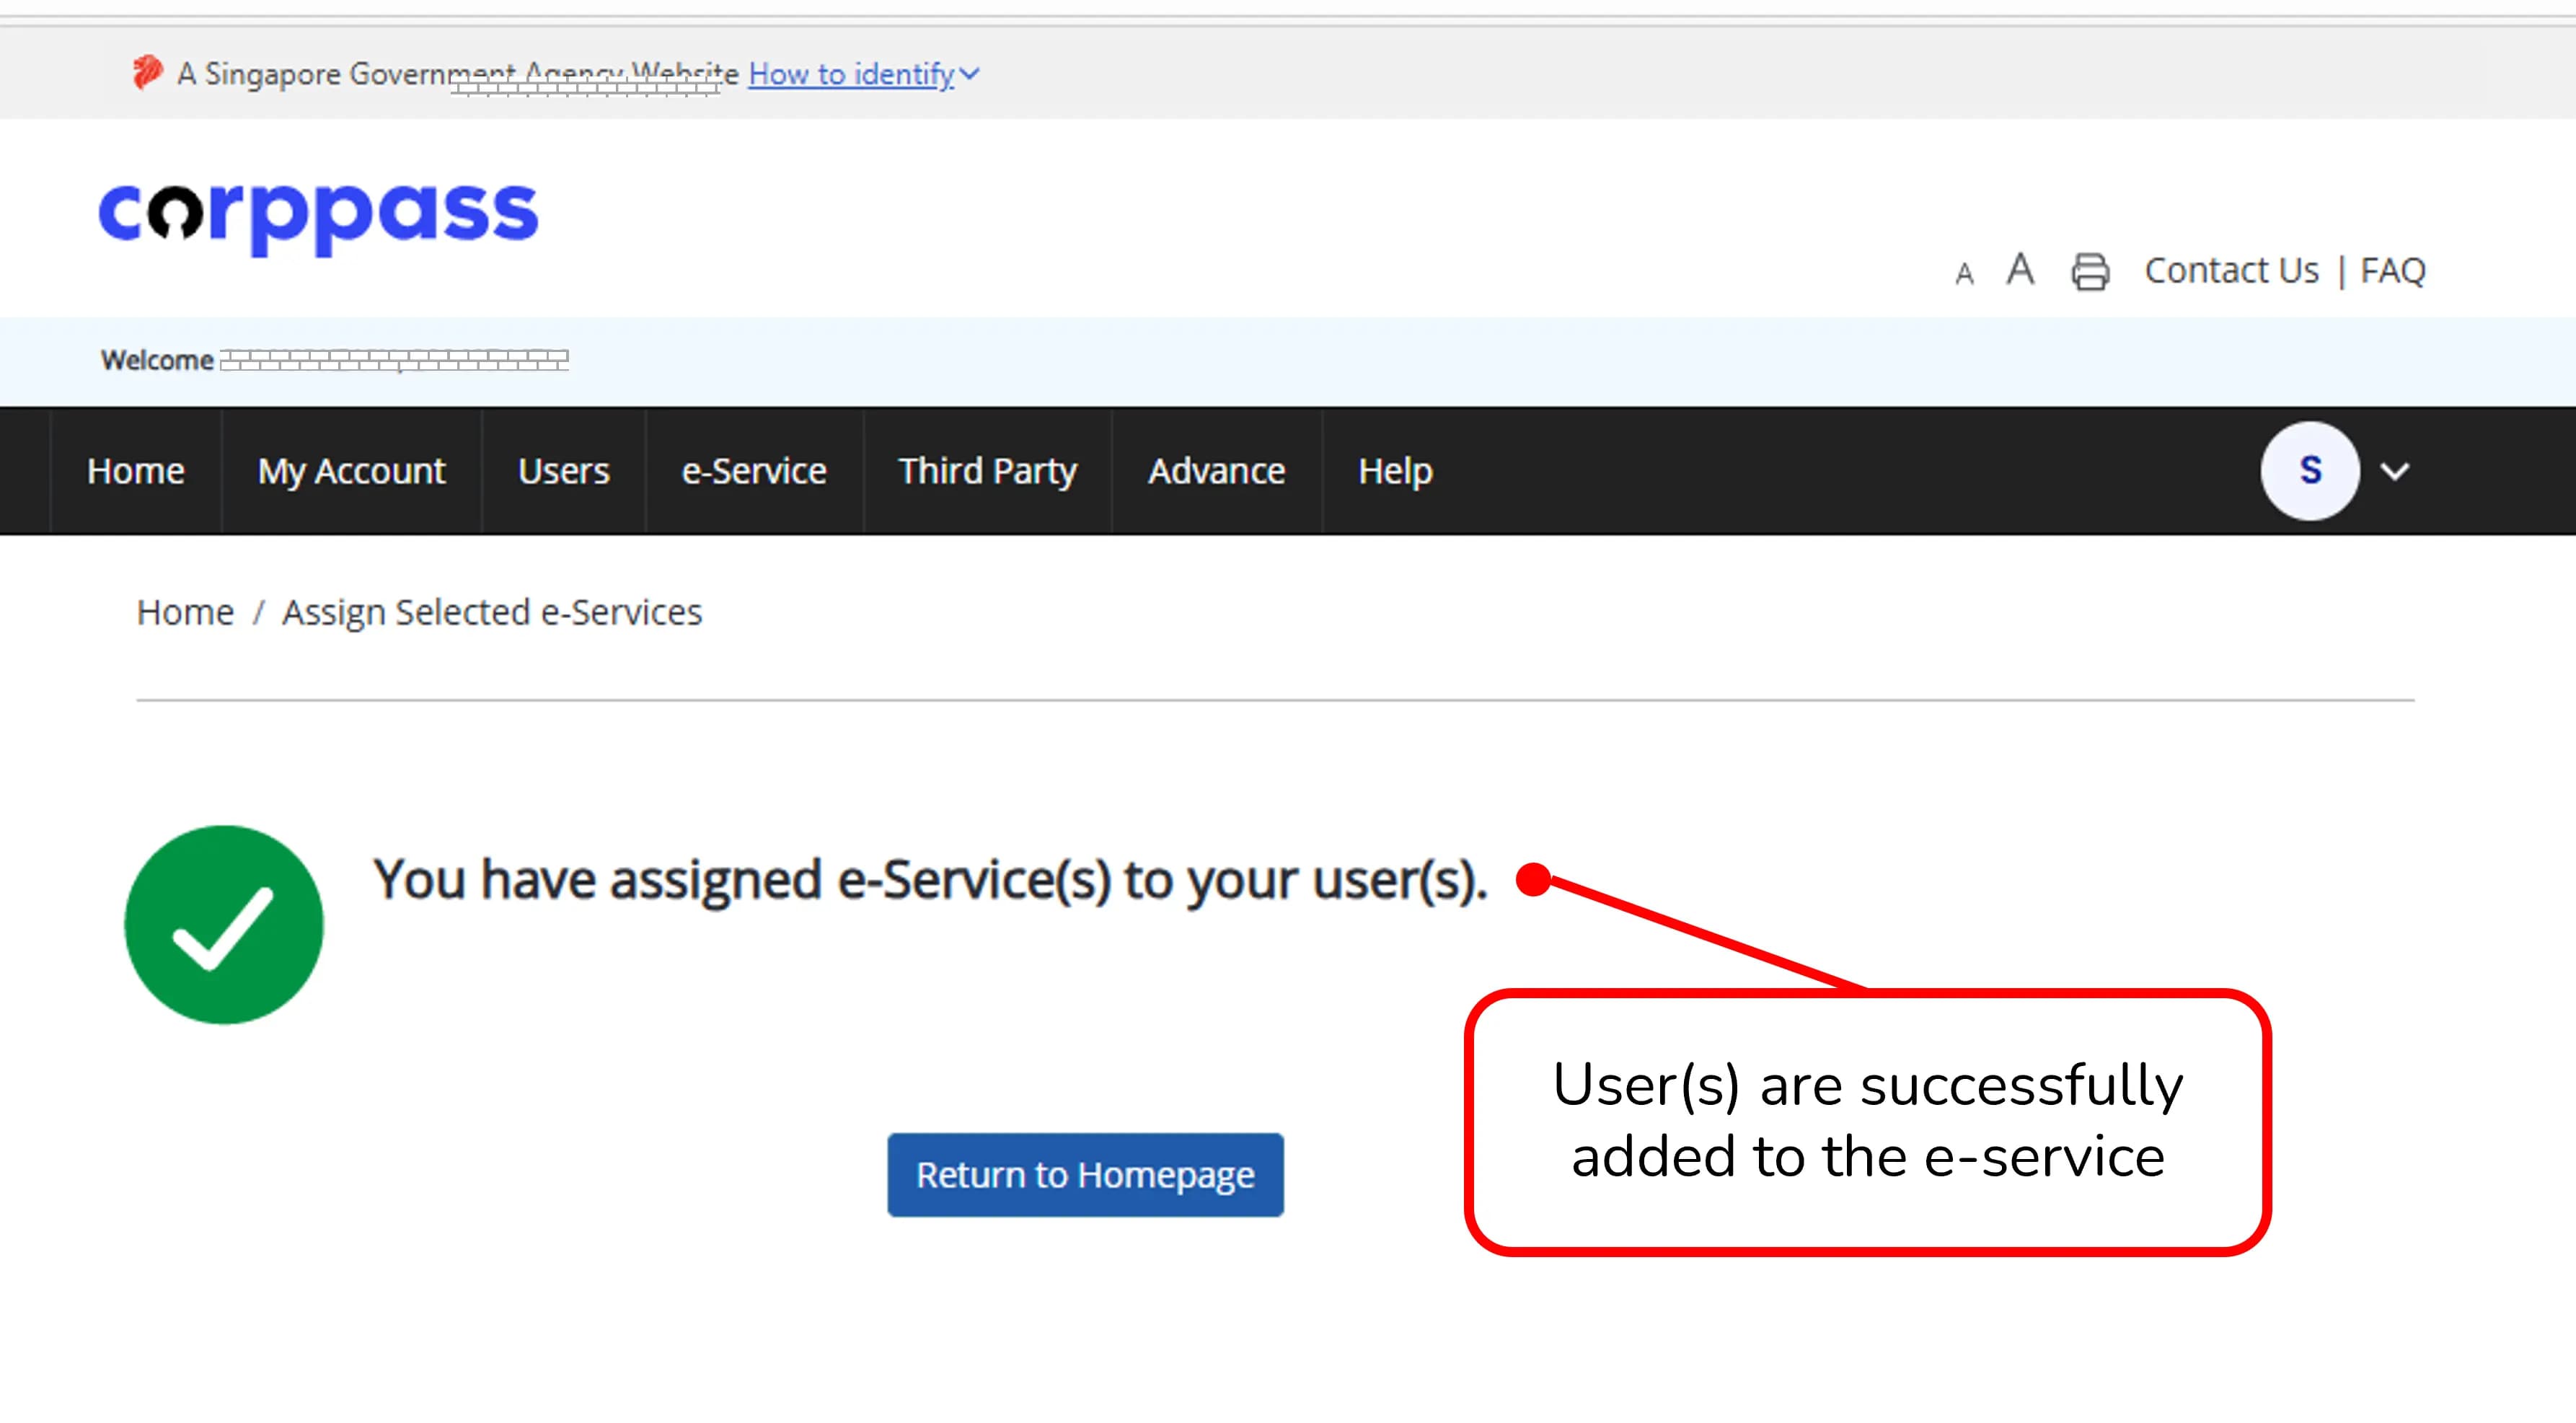
10
Assignment Successful
A green checkmark screen will appear, confirming that the user(s) are successfully added and assigned to the e-service.